How to deploy Chime on Azure
Chime for Lync can be deployed on a virtual machine located on Hyper-V, AWS, Google Cloud, or Azure. This page will guide you on how to deploy Chime on Azure. The deployment will involve eight steps, starting from creating a Windows virtual machine to configuring SSL certificate. At the end of this instruction, you should have Chime 2.7 installed and running.
Step 1 - Create a Windows virtual machine in the Azure portal
This step will show you how to create an Azure Windows virtual machine, which we will use to host Chime for Lync.
Create a virtual machine
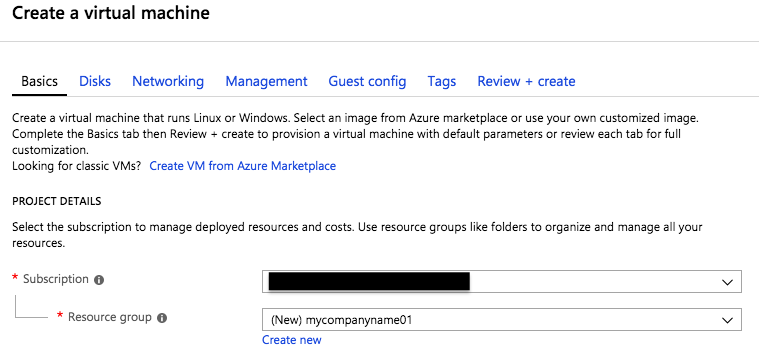
1.) Go to Azure Portal, Create Virtual Machine page (https://portal.azure.com/#create/Microsoft.VirtualMachine-ARM).
2.) Select your Azure subscription and create new resource group.
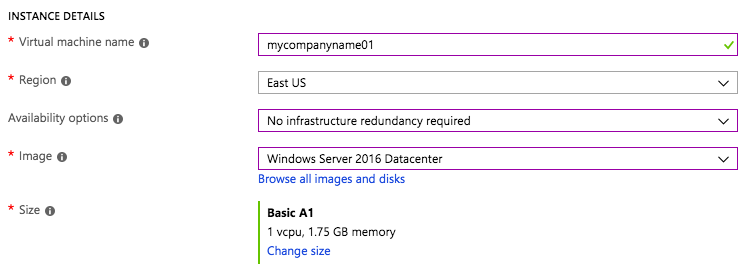
3.) Enter instance (VM) details. For VM size, it is required that you select a size with RAM greater than or equals to 1.7 GB. It is also required to select Windows Server 2016 Datacenter for the VM image.
4.) Create an administrator account.

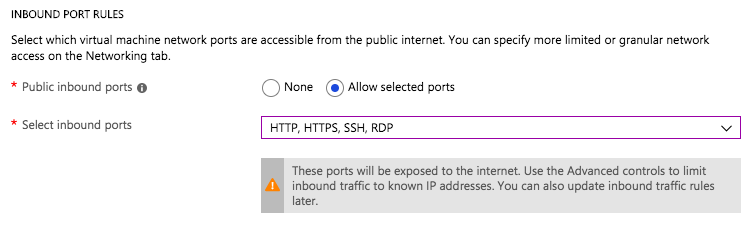
5.) Allow HTTP, HTTPS, SSH, and RDP inbound port rules.
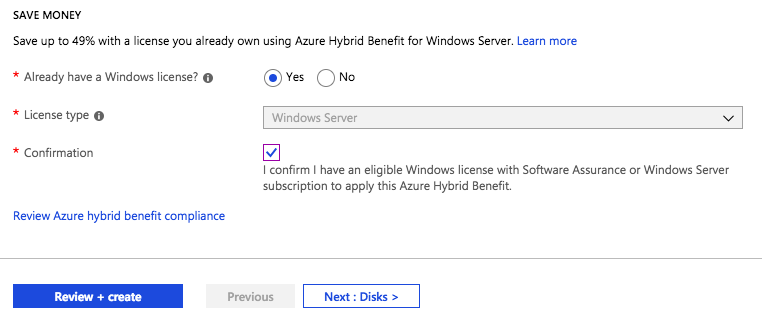
6.) Click the Review + create button. Then click the Create button. Note that It is fine to leave the rest of the settings default.
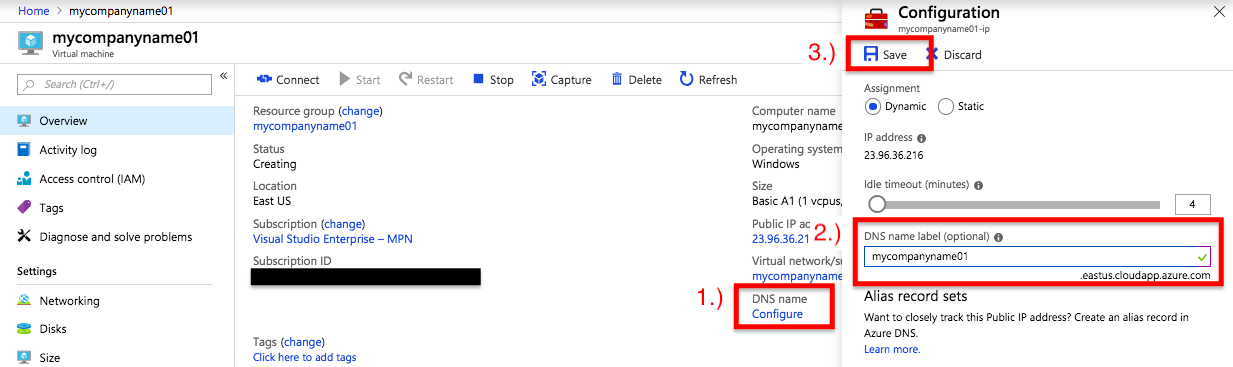
7.) Set DNS name label equals to VM name.
Step 2 - Setup Chime's prerequisites on the virtual machine
Chime for Lync uses Unified Communications Managed API 4.0 (UCMA) to work with Lync server. On this step, we will install UCMA 4.0 and other softwares on the VM so that Chime can run with all of its core features.
Connect to VM
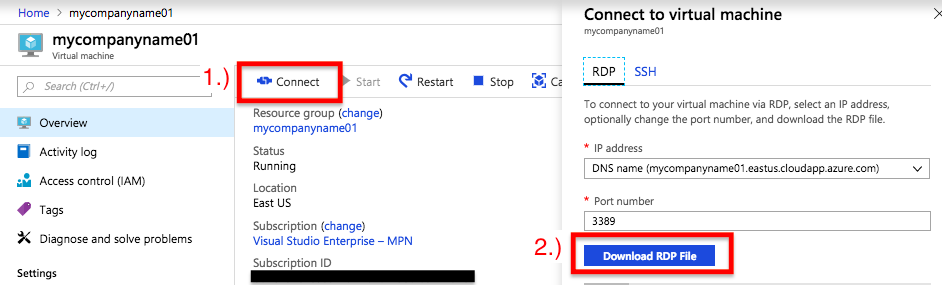
1.) If VM status running then you can try to connect to it. You can do this by downloading the VM's RDP file from Azure Portal and then use your Remote Desktop client to open the RDP file.
2.) Login into the VM using the VM's administrator username and password.
Setup Chime's prerequisites
s1.) Setting up Chime's prerequisites can be automated using PowerShell. To do this, open PowerShell inside the VM, copy the entire script below, paste it into PowerShell and hit enter. Finally, type Install-Chime-Prereq into PowerShell and hit enter, this should run the script to setup Chime's prerequisites.
Function Install-Chime-Prereq
                {
                # Install IIS
                Install-WindowsFeature -name Web-Server -IncludeManagementTools

                # Install Media Foundation from Server Manager
                Install-WindowsFeature Server-Media-Foundation

                # Install chocolatey, a windows package manager.
                # We will use this to install UCMA 4
                Set-ExecutionPolicy Bypass -Scope Process -Force; iex ((New-Object System.Net.WebClient).DownloadString('https://chocolatey.org/install.ps1'))

                # Enable choco feafure to skip confirmation
                choco feature enable -n allowGlobalConfirmation

                # Install UCMA 4
                choco install ucma4

                # Open port 443 (Firewall inbound rules)
                # TCP, 443, Allow Connection, Where[Domain, Private, public]
                New-NetFirewallRule -DisplayName "AllowPORT443" -LocalPort 443 -Action Allow -Direction Inbound -Protocol TCP -Profile Domain, Private, Public
                }
Step 3 - Create Azure AD web app registration
At this point, we should be able to install Chime on the VM. But before doing so, we are going to create Azure Active Directory Web App Registration. This app registration will have a application (client) id, and a key. Chime is going to use both application id and key for your secure Office365 web authentication or login, and to read directory data.
Create new web app registration
1.) To create a new web app registration, go to https://portal.azure.com/#blade/Microsoft_AAD_IAM/ActiveDirectoryMenuBlade/RegisteredApps.
2.) Click New application registration.
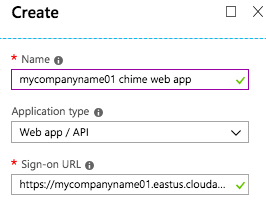
3.) Enter Name, Application Type, and Sign-on URL. For the Sign-on URL, use the vm's DNS name, and then add https:// as prefix.
4.) Click the Create button.
Configure reply URLs
1.) Add two reply URLs to your web app registration (for example, see image below #3). To do this, go to your app registration Settings > Reply URLs. Then enter the reply URLs with the following format:
- https://[FULL_VM_DNS]/Chime
- https://[FULL_VM_DNS]/Chime/?a

Add owner
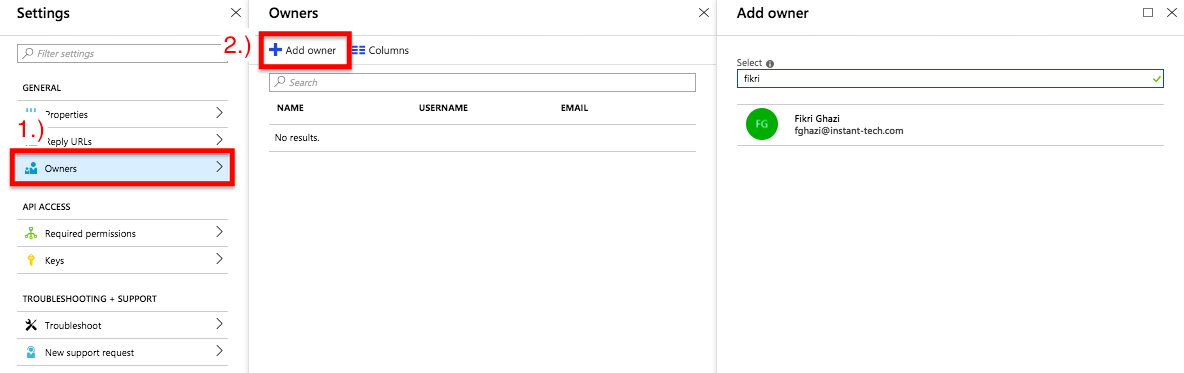
1.) Add one owner who has admin privileges in your active directory. In your app registration details go to Settings > Owners. Click Add owner. In the add owner pane, search, select, and add your admin.
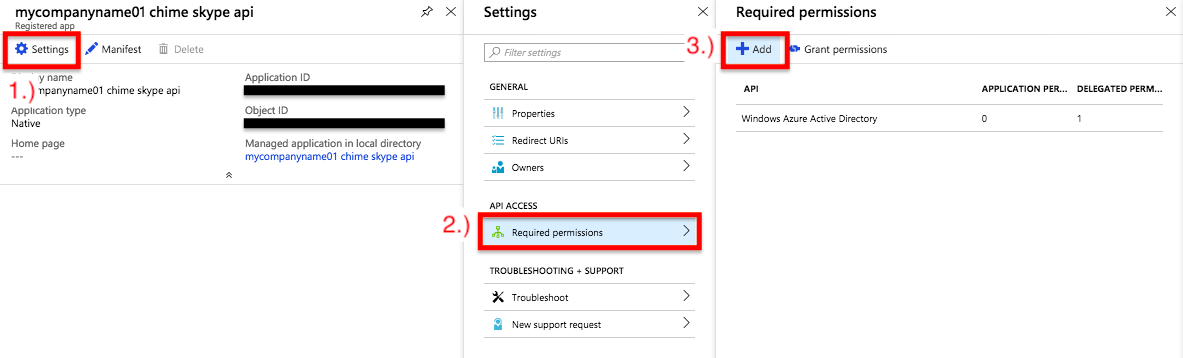
Enable read directory data
1.) To enable the Read directory data go to app registration Settings > Required permissions > Windows Azure Active Directory. Check the Read directory data, then hit the Save button.
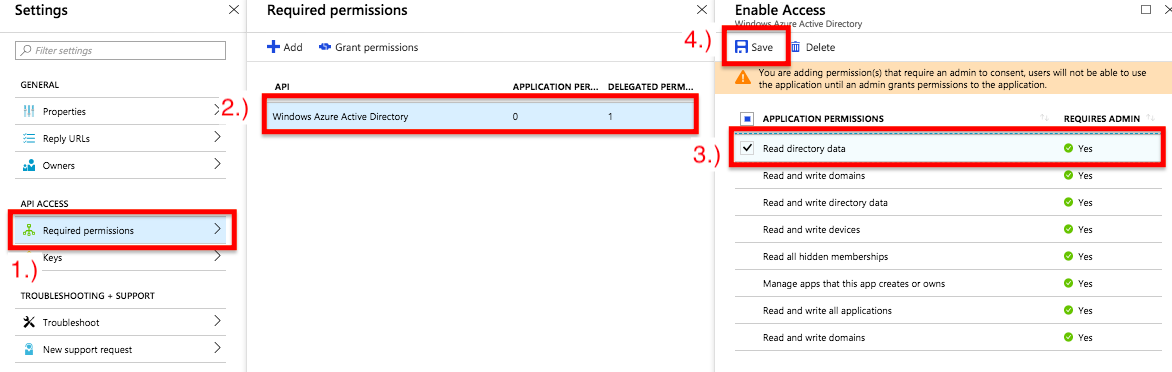
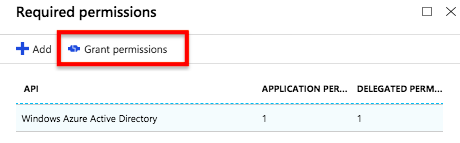
2.) After saving required permissions, finally, click the Grant permissions. Click the Yes button when Azure gives you a confirmation dialog.
Obtain app registration's application id and key
1.) To get the application id from Azure Portal, go to Azure Active Directory > App Registrations. Here you can search your app registration name. If the search result is blank, you might need to search for All Apps.
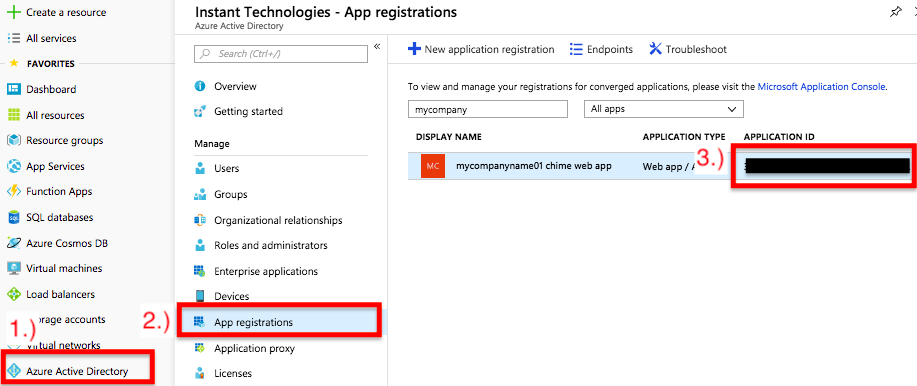
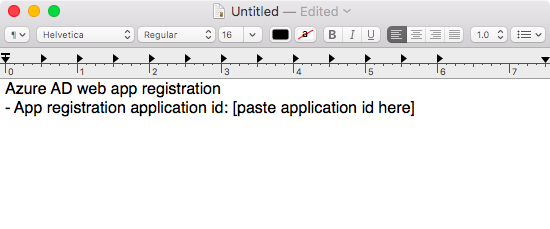
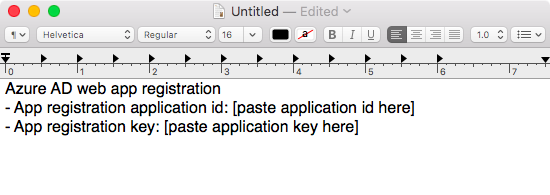
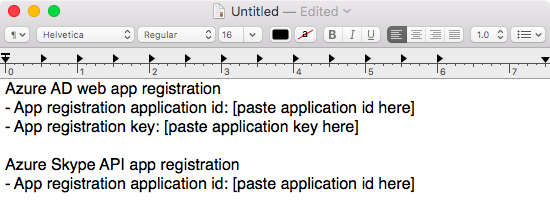
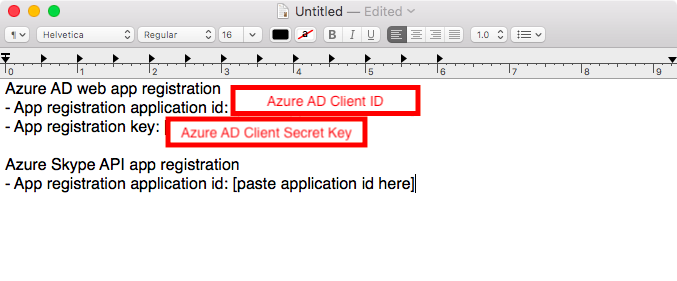
2.) Copy and paste your application id into a temporary text file or document.
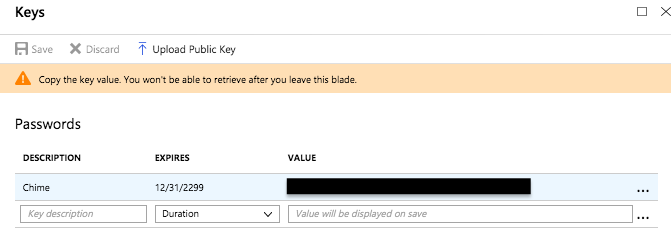
3.) And to get the key, go to your app registration's Settings > Keys. Type in Chime for the description, set to Never expires, then hit Save. The key will appear after you save.
4.) Copy and paste your application key into the text file that you created previously.
Step 4 - Create Skype API Native app registration
We need to create one more app registration. This time we are going to create a Skype API app registration. Chime uses the Skype API to sign in the queue dispatcher account to Skype for Business Online and perform necessary operations such as responding to incoming chats, or initiating outbound chats to prompt helpdesk agents to accept chats.
Create a new Skype API Native app registration
1.) In the Azure Portal, go to Azure Active Directory > App Registrations > New application registration.
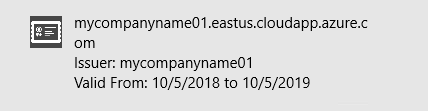
2.) Type in a name for your Skype API registration. Select Native application type. For Redirect URL, type in your VM's DNS with https and /Chime. For example, https://mycompanyname01.eastus.cloudapp.azure.com/Chime.

3.) Hit the Create button.
Add Skype for Business Online API access
1.) First go to your app details page, then go to Settings > Required permissions > Add.
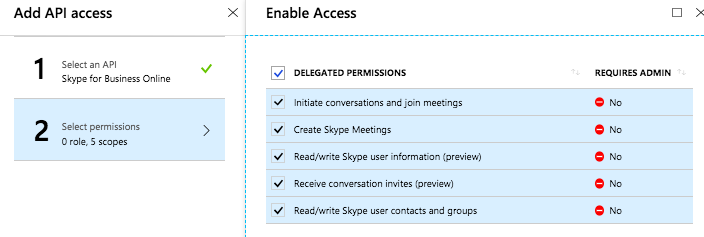
2.) Second, click Select an API and select Skype for Business Online.
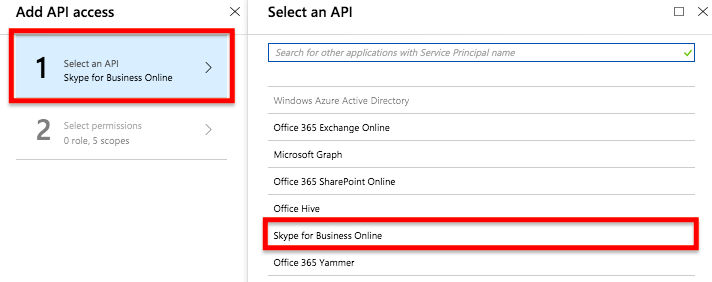
3.) Select all delegated permissions and click Select then click Done.
4.) Next click the Grant permissions button. Click Yes if Azure gives you a confirmation dialog.

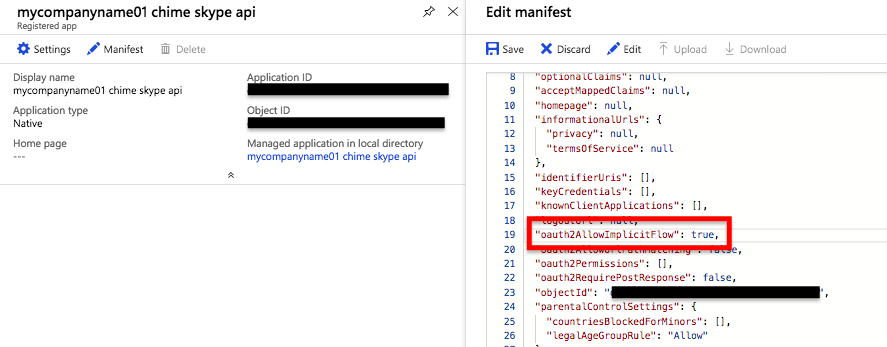
Set Skype API OAuth 2 Implicit Flow to true
1.) Go to your Skype API app registration detail. Click the Manifest button. Then set the oauth3AllowImplicitFlow value to true. Click Save.
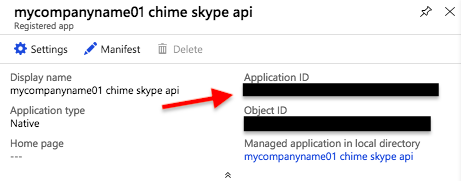
Obtain Skype API application id
1.) Find your Skype API app registration application id, and then copy and paste it into your text file which you created previously.
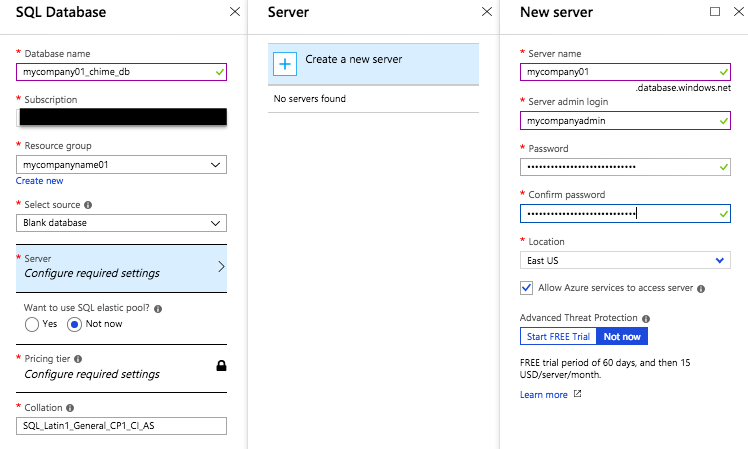
Step 5 - Create an empty SQL database
Chime uses an SQL database to store data. If you already have an SQL server, you can create an empty SQL database there. But let's suppose that you don't have one. This step will show you how to create an empty SQL database and SQL server.
Create empty SQL database
1.) In Azure Portal, go to SQL databases, then click Add. Or simply go to https://portal.azure.com/#create/Microsoft.SQLDatabase
2.) Type in database name, select subscription and resource group. Select Blank database under select source.
3.) To create a new SQL server, go to Server > Create a new server. Fill in server name and create admin.
4.) Click the Select button, then click Create to create a new SQL server and a database.
Step 6 - Install Chime
So far we have created a VM, installed Chime prerequisite softwares on that VM, created Azure web app and Skype API registrations, and create d a new database. The next step will be installing Chime on the VM using all of the resources that we have created.
Download the latest Chime for Lync
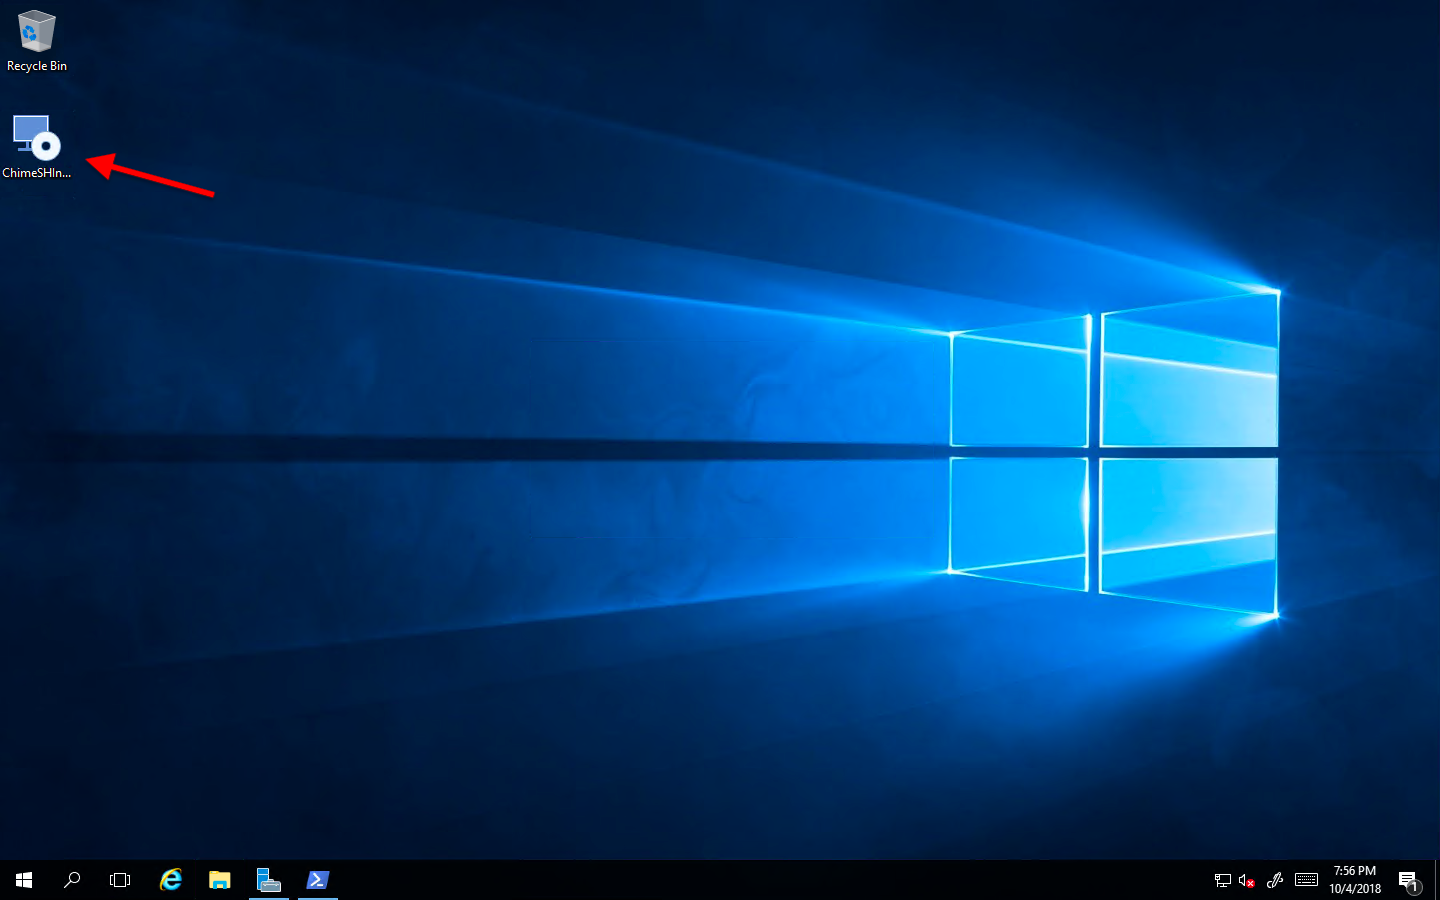
1.) From your local computer, download Chime for Lync installer here.
2.) Once download is complete, extract the zip file. The extracted folder should contains some PDF documentations and there should be ChimeSHInstaller.exe. Copy the ChimeSHInstaller.exe from local computer to VM's desktop.
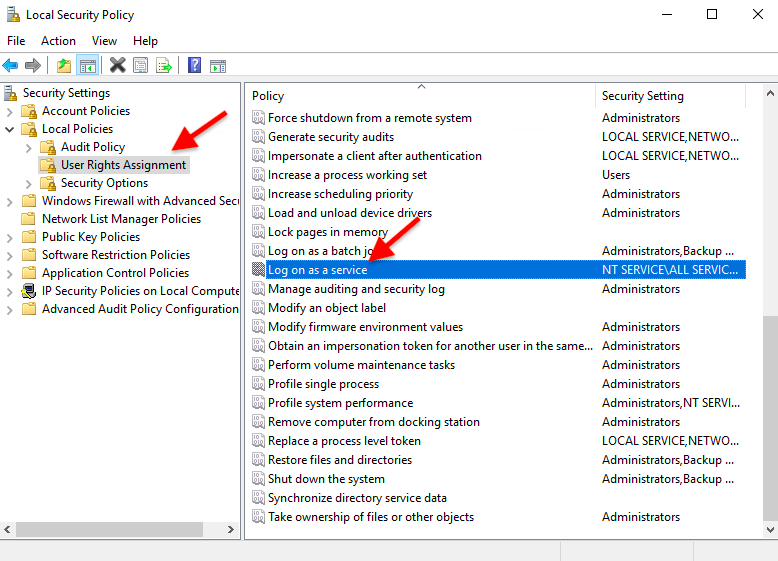
Verify that admin have sufficient privileges to install system services before running Chime installer
1.) Open VM's Local Security Policy.
2.) Go to Local Policies > User Rights Assignment.
3.) Double click Log on as a service.
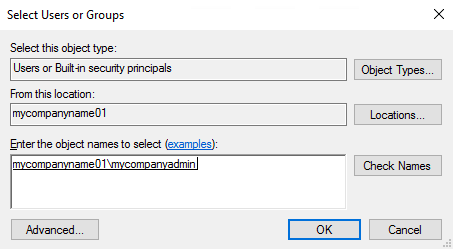
4.) Click Add User or Group...
5.)Type in your admin username, and click Check Names.
6.) Click OK and the apply changes.
Install Chime
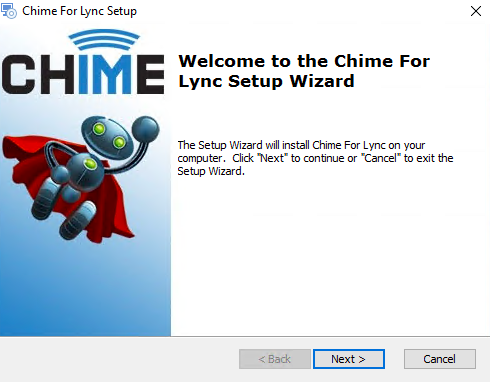
1.) Run the ChimeSHInstaller.exe
2.) Click Next on the Welcome Wizard.
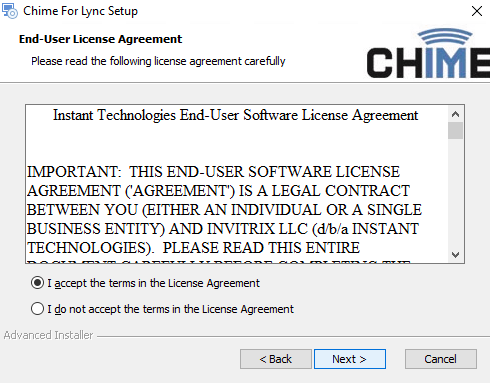
3.) Accept the End-User License Agreement, and click Next.
4.) Select Custom Installation Settings. Click Next.

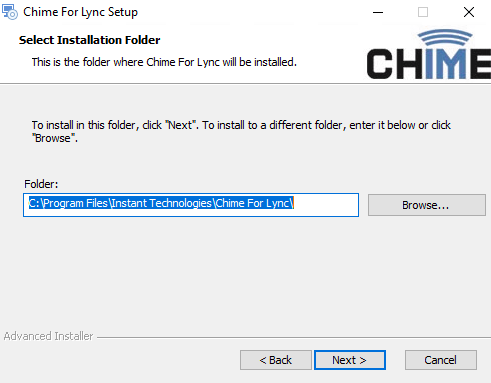
5.) Click Next on the Select Installation Folder.
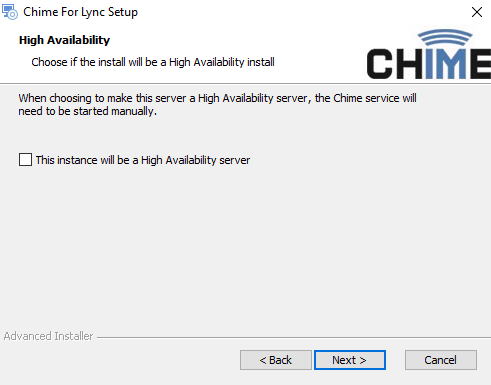
6.) Leave the High Availability unchecked. Click Next.
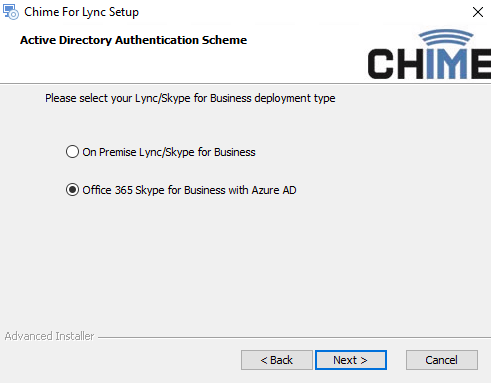
7.) Select Active Office365 for Business with Azure AD. Click Next.
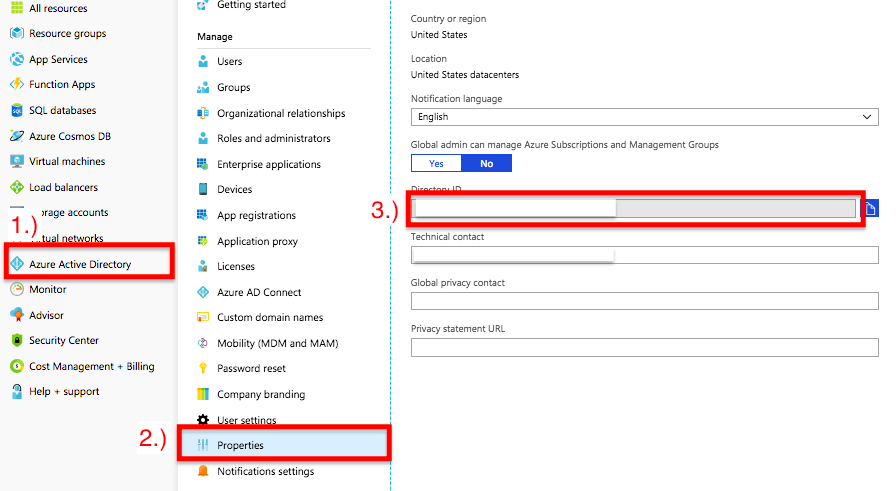
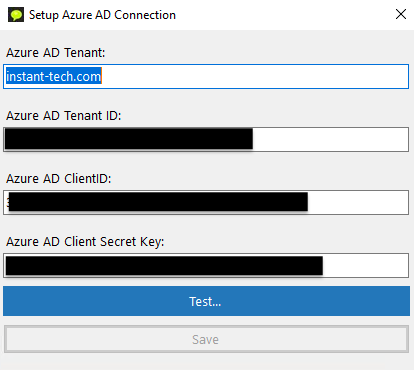
8.) To get a copy of your Tenant ID in Azure Portal, go to Azure Active Directory > Properties. Directory ID is your Tenant ID.
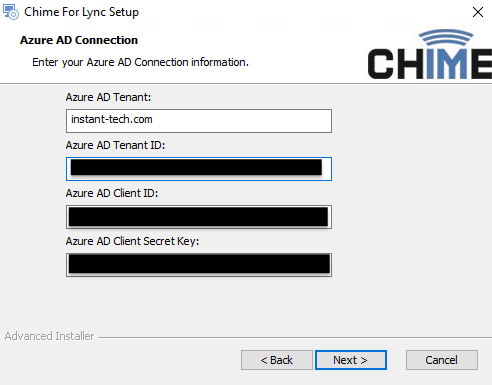
9.) Enter your Tenant, Tenant ID, Azure AD Client ID and Key. Note that Azure AD Client ID is Azure AD web app application ID that we created in step 3.
10.) Enter your database info. Select SQL Authentication. Click Test Connection to make sure that your connection is successful. If connection is successful, click Next. Note that this might take a few minutes.
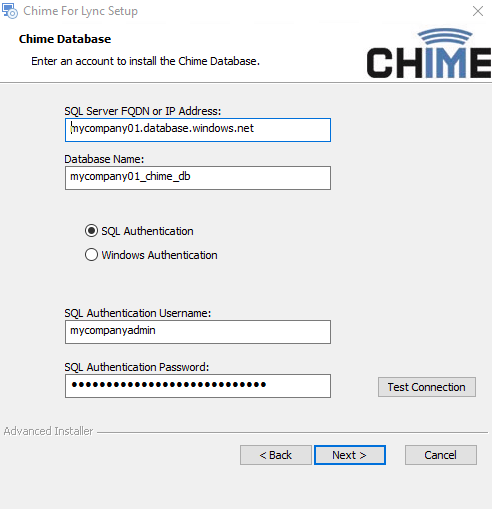
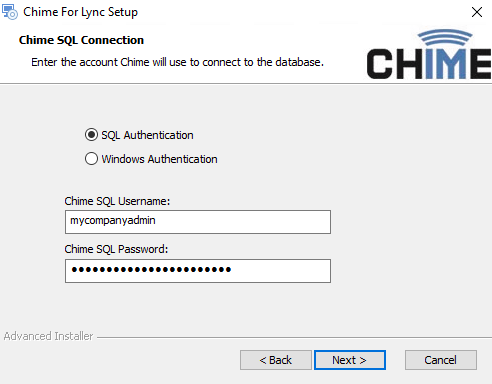
11.) Enter your SQL username and password again.
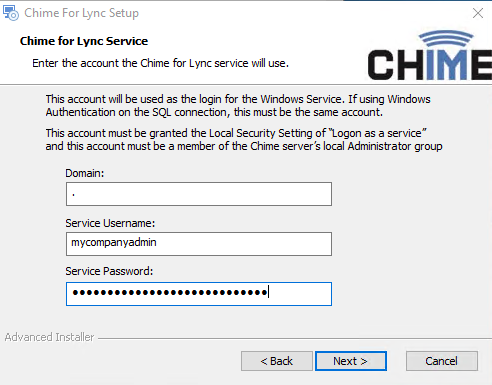
12.) Fill out the Chime for Lync Service form. Start by entering a dot for the Domain. Enter your VM admin username for Service Username. Enter your VM admin password for Service Password.
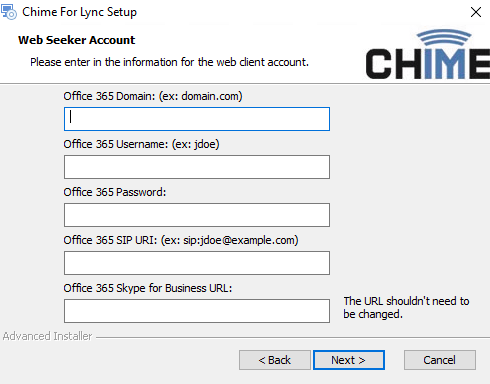
13.) Leave the Web Seeker Account form blank. Click Next.
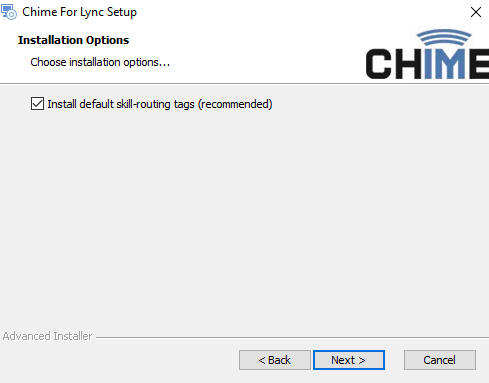
14.) Check the Install default skill-routing tags. Click Next.
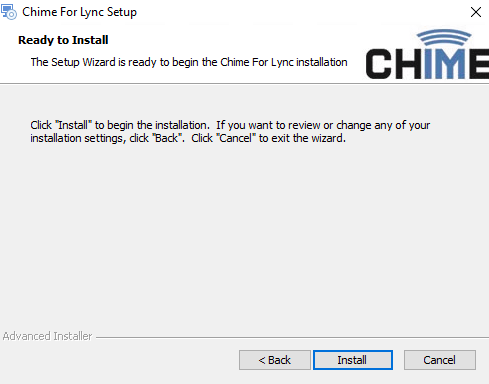
15.) Click Install.
Step 7 - Configure and verify Chime settings
We are almost done. The next step is to configure some Chime settings for Azure deployment.
Verify Azure AD Connection
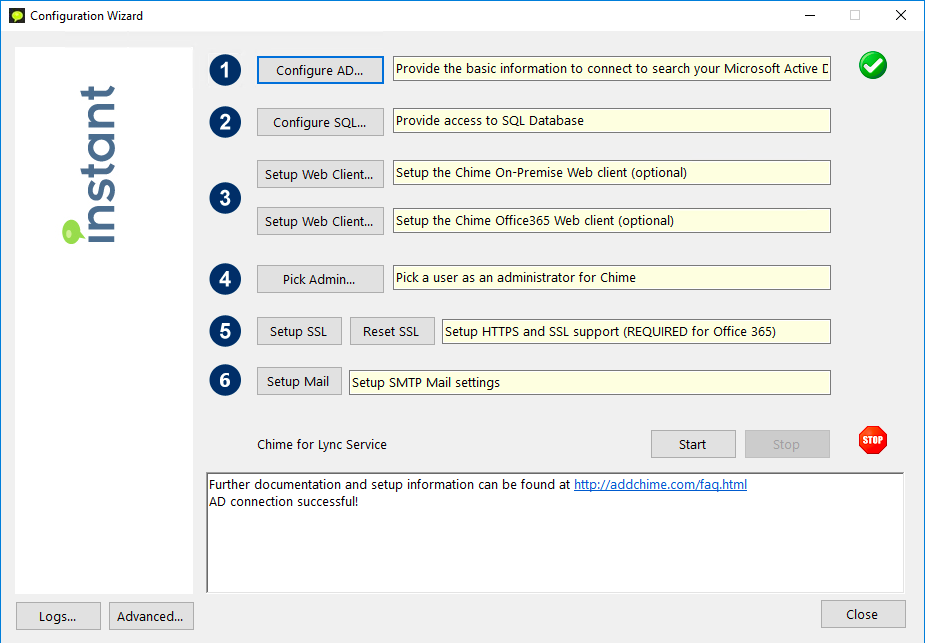
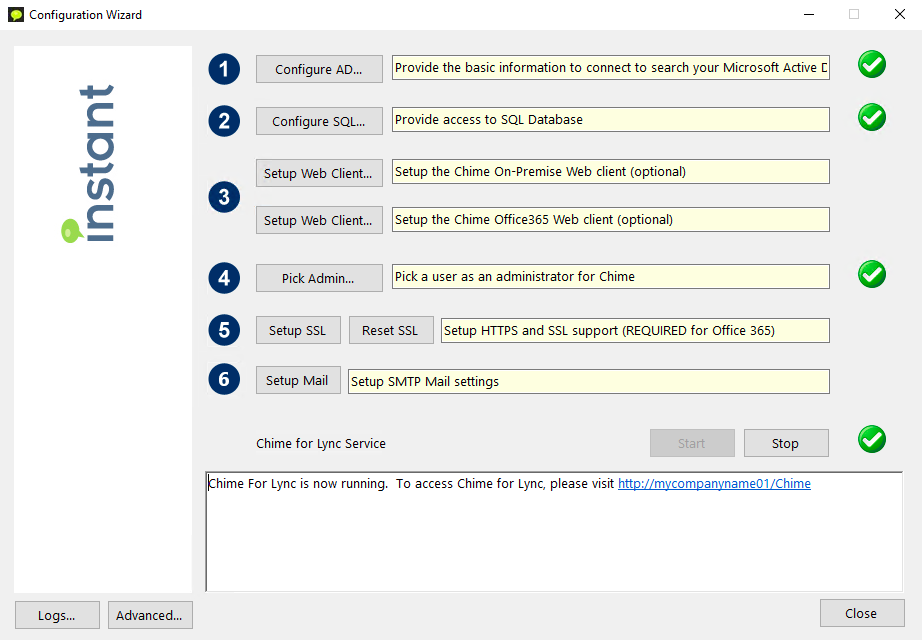
1.) Open Chime Configuration Wizard.
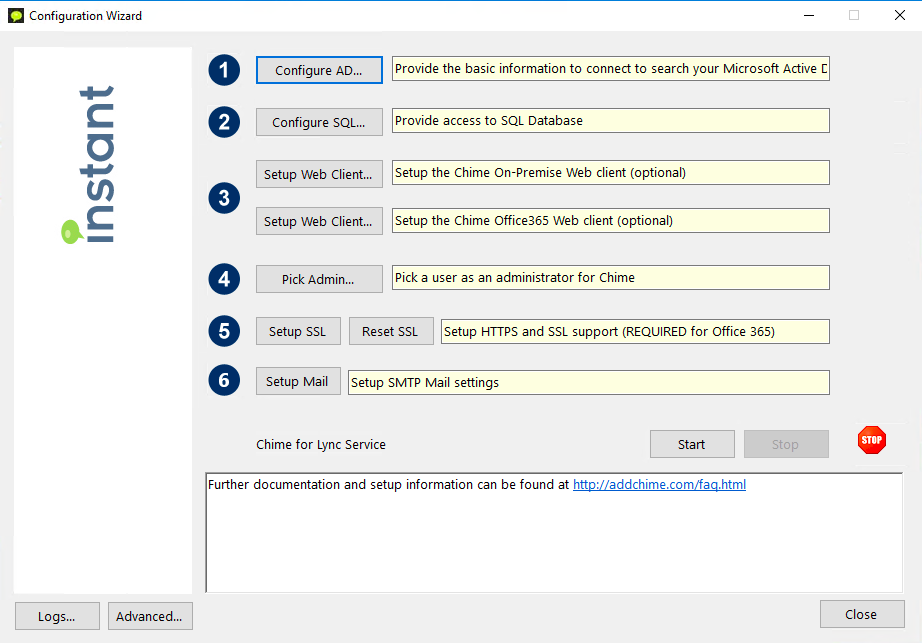
2.) Click Configure AD...
3.) Click Test... and then click Save. ****If your verification is successful, then you should see a green check in Chime Configuration Wizard.
Verify SQL Connection
1.) In Chime Configuration Wizard, click the Configure SQL... button.
2.) Click Test Connection.
3.) Click OK.
Pick an admin
1.) In Chime Configuration Wizard, click Pick Admin...
2.) Use the search bar to find your admin. Highlight your admin, then click OK.
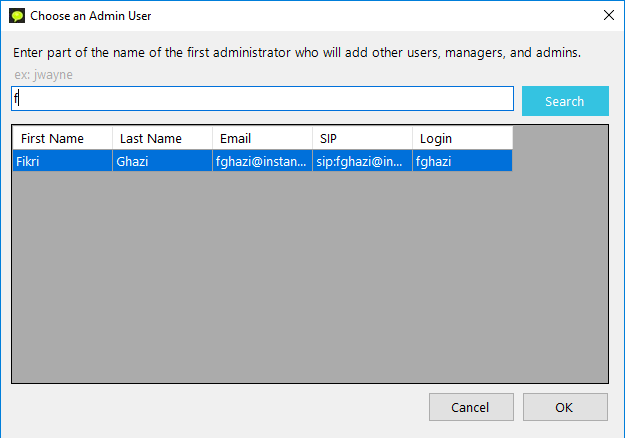
3.) Leave Chime Config Wizard open and proceed to the next instruction.
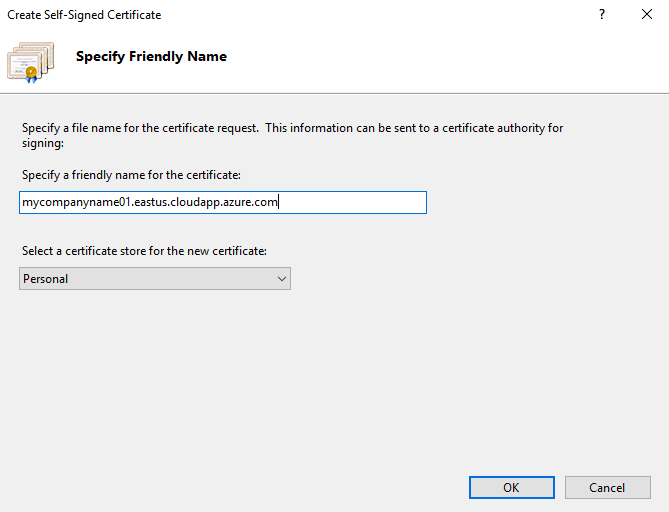
Create (temporary) self-signed certificate
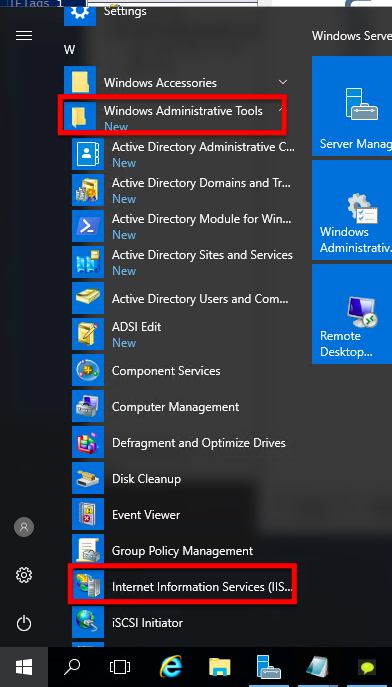
1.) First, open IIS Manager. It is located in Start > Windows Administrative Tools.
2.) Go to your server, then double click Server Certificates.

3.) Click Create Self-Signed Certificate...
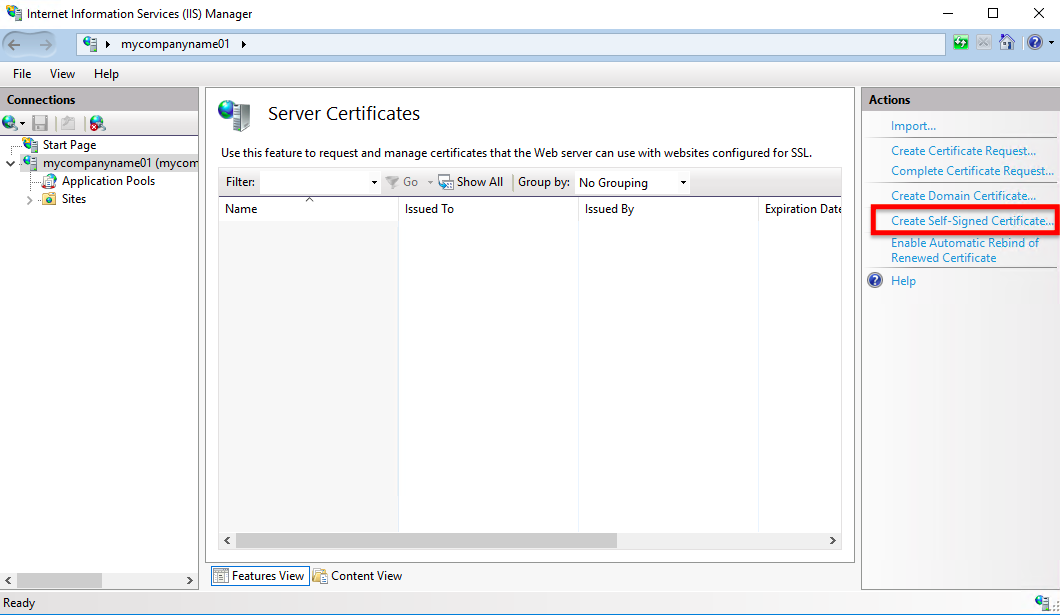
4.) Enter your VM DNS then click OK.
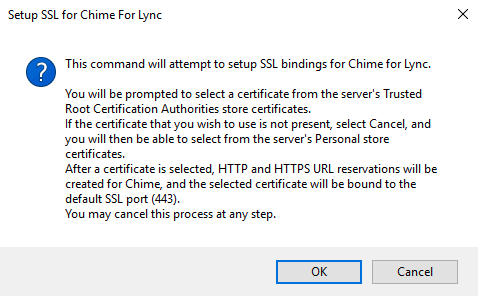
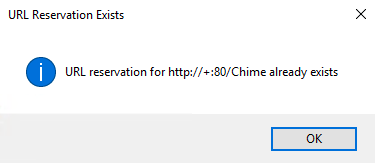
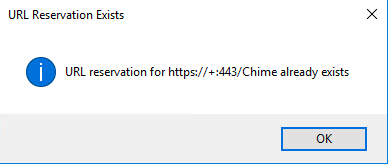
Setup SSL
1.) Open Chime Config Wizard.
2.) Click Setup SSL.
3.) Click OK on all of the dialogs below:
4.) On Select SSL Certificate window, click More choices.
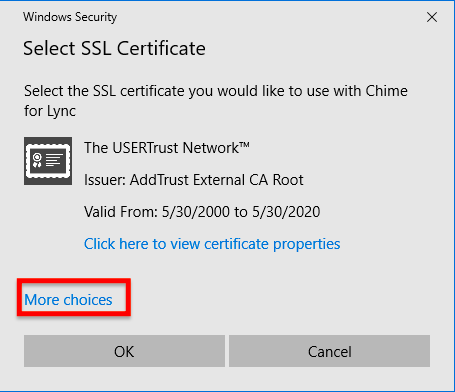
5.) Select the self-signed certificate that you created earlier.
6.) Click OK, then click Yes when asked to execute command.
Configure Chime Advanced Settings
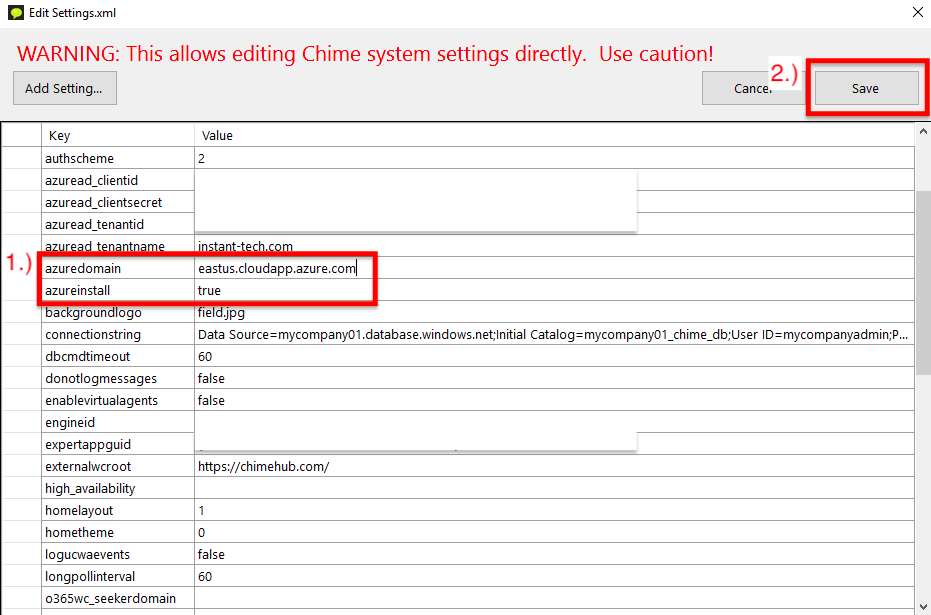
1.) In Chime Configuration Wizard, click the Advanced... button.
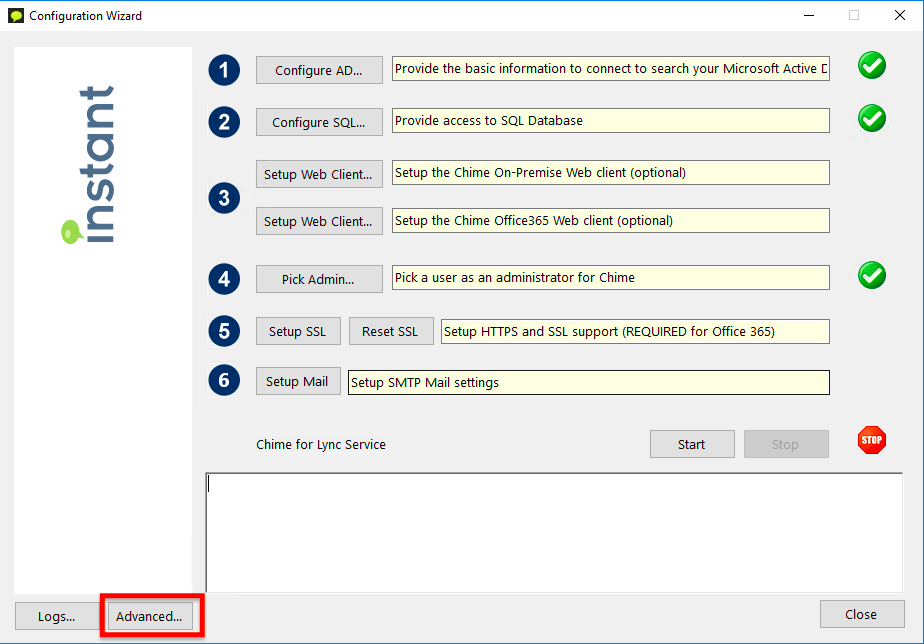
2.) Set azuredomain value to your VM's DNS domain.
3.) Set azureinstall value to true.
4.) Click Save, and click Yes to confirm changes.
Start Chime
1.) At this point we have successfully setup AD Connection, SQL Connection, Advanced Settings, and SSL. Now in Chime Configuration Wizard, click the Start button.
2.) Verify that your Chime is running using the message located in the Chime Configuration Wizard.
3.) Leave Chime Configuration Wizard open.
Consent to use the Azure AD web app registration
1.) Open a web browser from your local computer.
2.) Copy and paste the following URL into your web browser's address bar:
https://login.windows.net/common/oauth3/authorize?response_type=code&client_id=YOUR_WEB_APP_CLIENT_ID&prompt=admin_consent
3.) Replace the YOUR_WEB_APP_CLIENT_ID in the URL with your web app client id.
4.) Hit enter and you should get directed to Office365 login page.
5.) Login using your admin account.
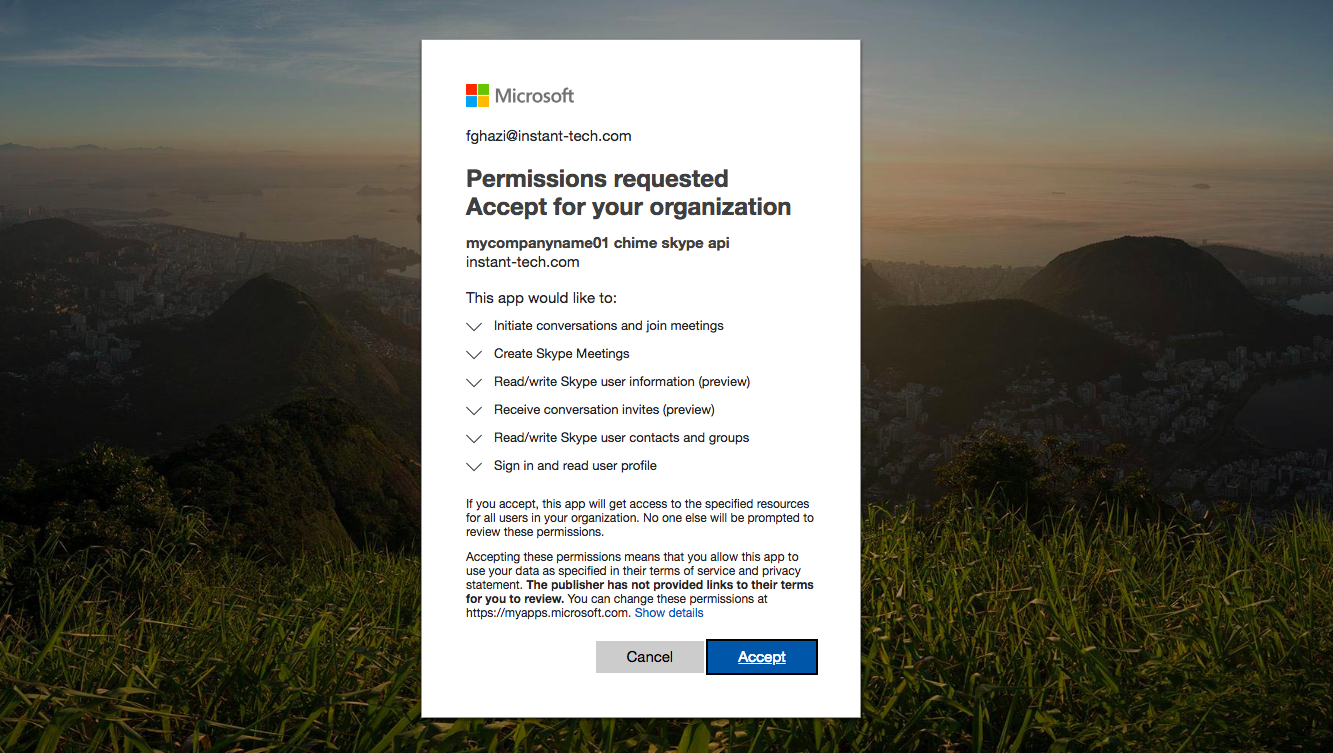
6.) Click Accept on permission request.
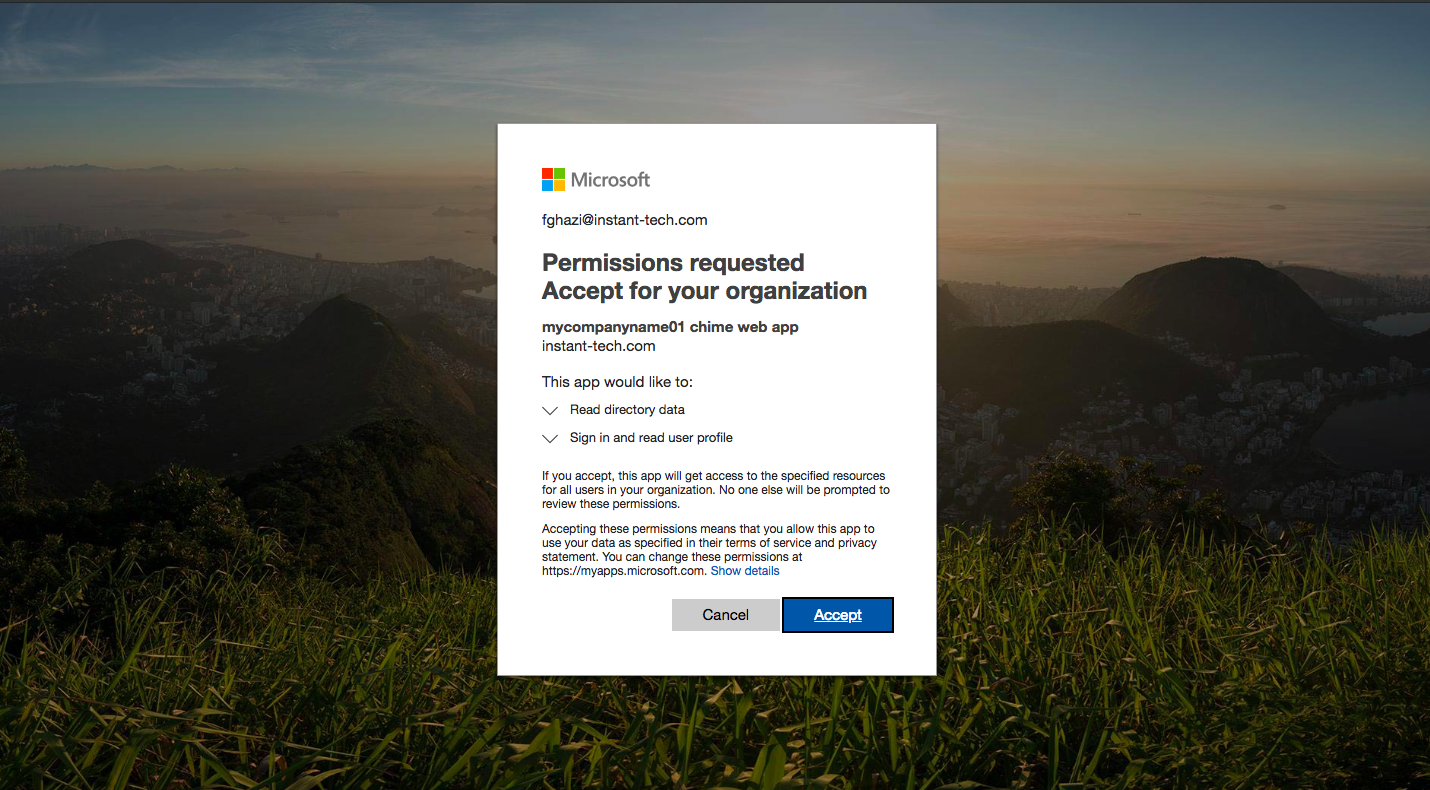
7.) If you see an un-secure connection warning, then click ADVANCED. Then click Proceed to the website.
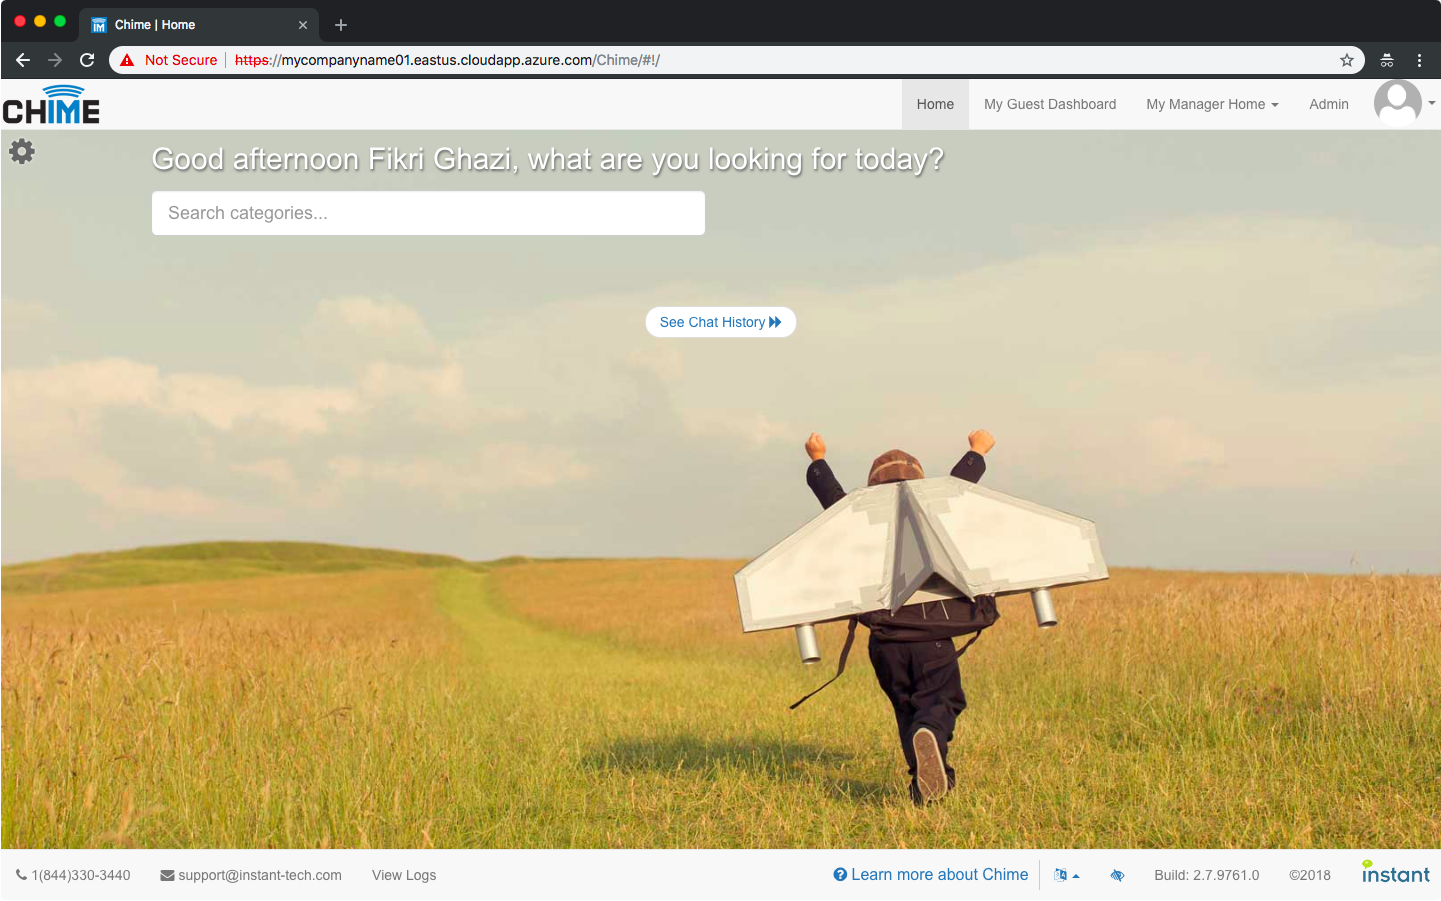
8.) If successful, you shall see the Chime logo.

9.) Then you shall get directed to the Chime Home page.
Consent to use the Skype API app registration
1.) Open a web browser in your local computer.
2.) Copy and paste the following link into web browser's address bar:
https://login.windows.net/common/oauth3/authorize?response_type=code&client_id=YOUR_SKYPE_API_CLIENT_ID&prompt=admin_consent
3.) Replace the YOUR_SKYPE_API_CLIENT_ID in the URL ******with your actual Skype client id.
4.) Hit enter and you should see an Office365 login page.
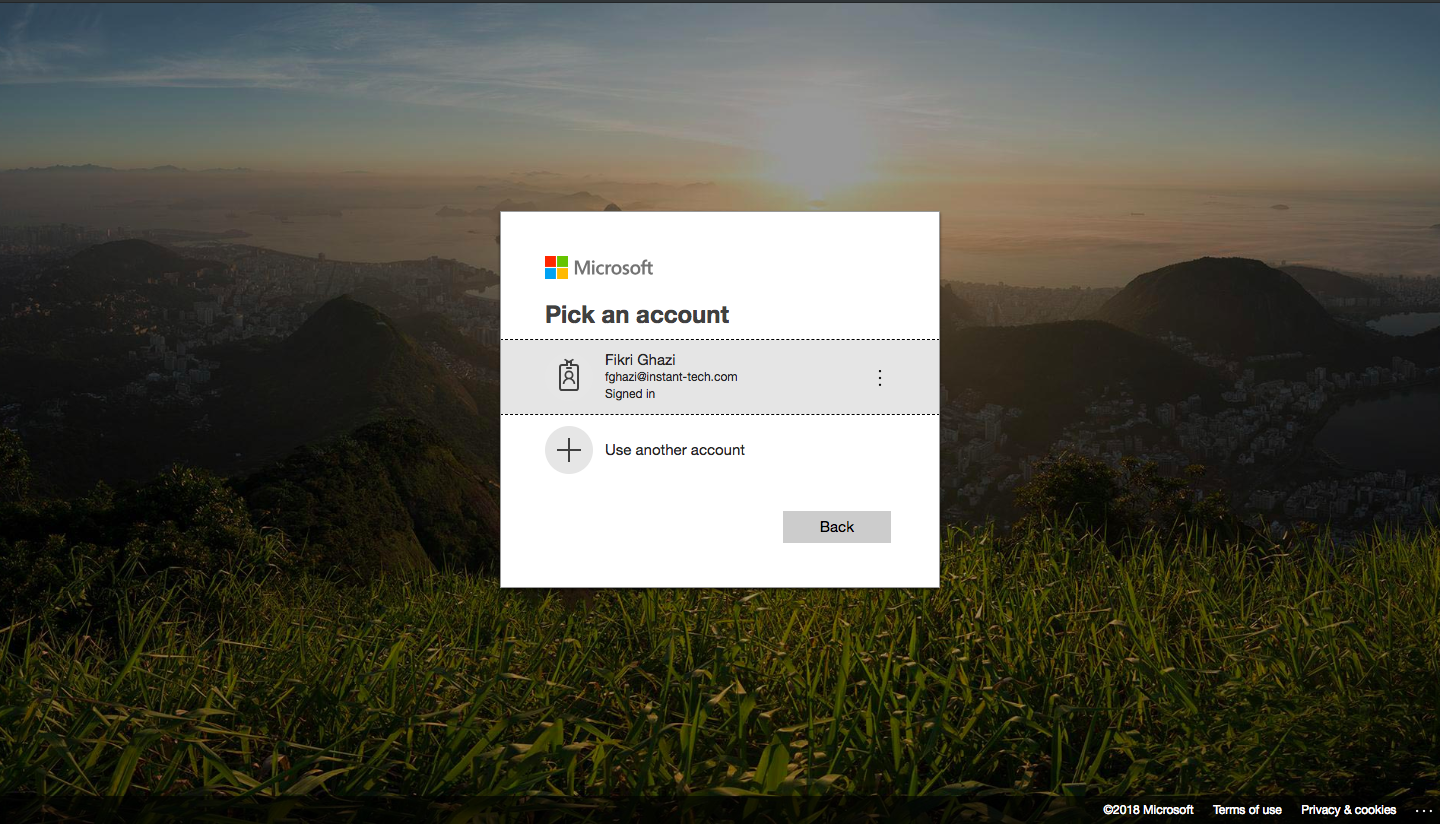
5.) Login using an admin account.
6.) Read through the acceptance details. Then click Accept.
7.) If successful, you should get directed to the Chime Home page.
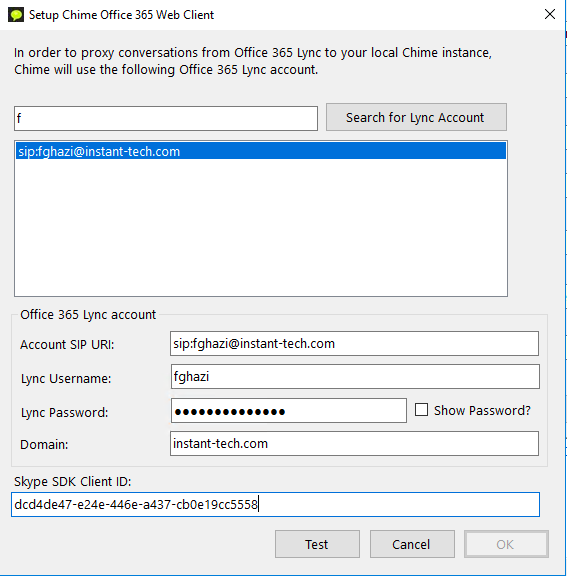
Configure and verify Web Client
1.) We have Chime running but, we have not setup its web client. To do this, go back to your VM, open Chime Configuration Wizard, and click the second Setup Web Client... button which is for Office365 Web Client.

2.) Use the search bar to find your admin.
3.) Click your admin to highlight. This will fill out the form.
4.) Enter your admin password.
5.) Copy and paste your Skype API application (client) id into the Skype SDK Client ID.
6.) Click Test. Then click OK.
Restart Chime
1.) Go to the VM.
2.) Open Chime Configuration Wizard.
3.) Click Stop.
4.) Once it is stopped, click Start.
Step 8 - Configure SSL
1.) You might notice on your browser that https is not working or site is not secure. Or you might want your Chime Url to use your business domain. To fix this, go to your VM.

2.) First, import your certificate into the VM.
3.) Open Command Prompt.
4.) Type mmc and hit enter.
5.) Click File > Add/Remove Snap-in > Certificates > Add
6.) Select Computer account > Local computer > Finish > OK
7.) In Certificates dropdown, right click Web Hosting > All Tasks > Import
8.) Select PFX file type > Navigate to certificate > Select and open.
9.) Add to Trusted Root Certificates store.
10.) Open Chime Configuration Wizard.
11.) Stop Chime.
12.) Click Reset SSL, click OK all dialogs.
13.) Click Setup SSL, and setup your new Certificate.
14.) Start Chime.
Next steps...
Congratulations, you have installed Chime on an Azure VM. The next steps would be setting up a queue and start routing chats, which you can learn here.