Overview
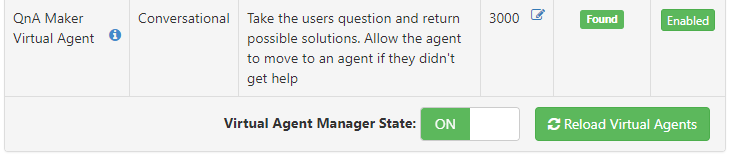
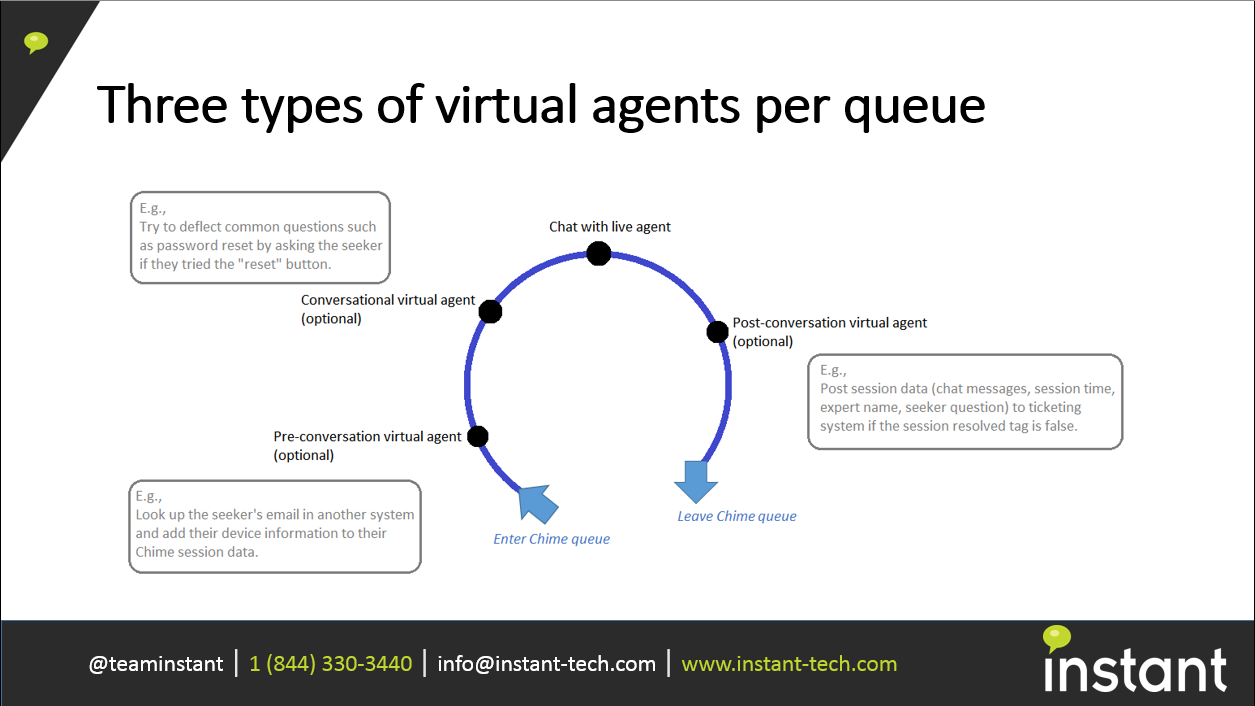
The QnA Maker Virtual Agent enables Chime users to use Microsoft's QnA Maker Cognitive Service. Before routing into a queue, the Virtual Agent intercepts the
chat session and will query a QnA Maker knowledge base to find any relevent documentation, FAQs, product manuals, or other files. The Seeker will then be
able to see answers to their question without ever needing to route to an Agent. This page will cover how to download, configure and deploy a QnA Maker
Virtual Agent onto your Chime server as well as provide a guide to building your own custom QnA Maker Virtual Agent.
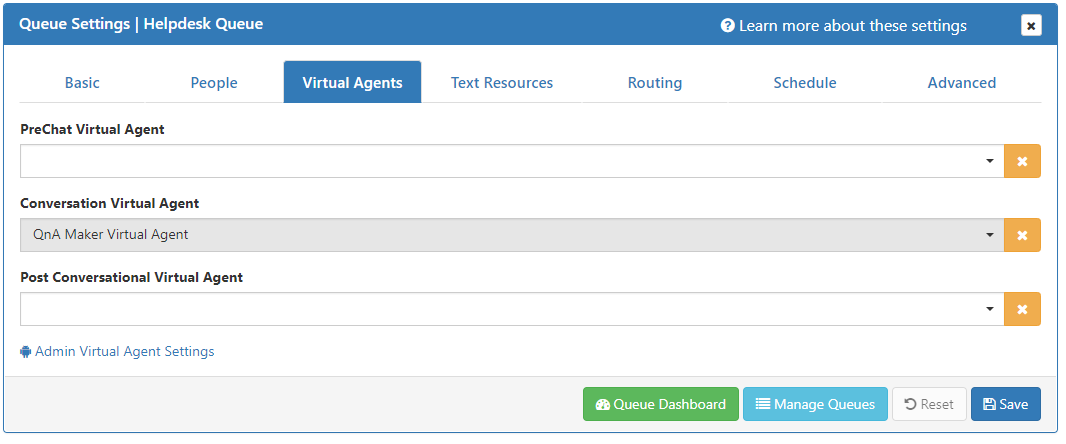
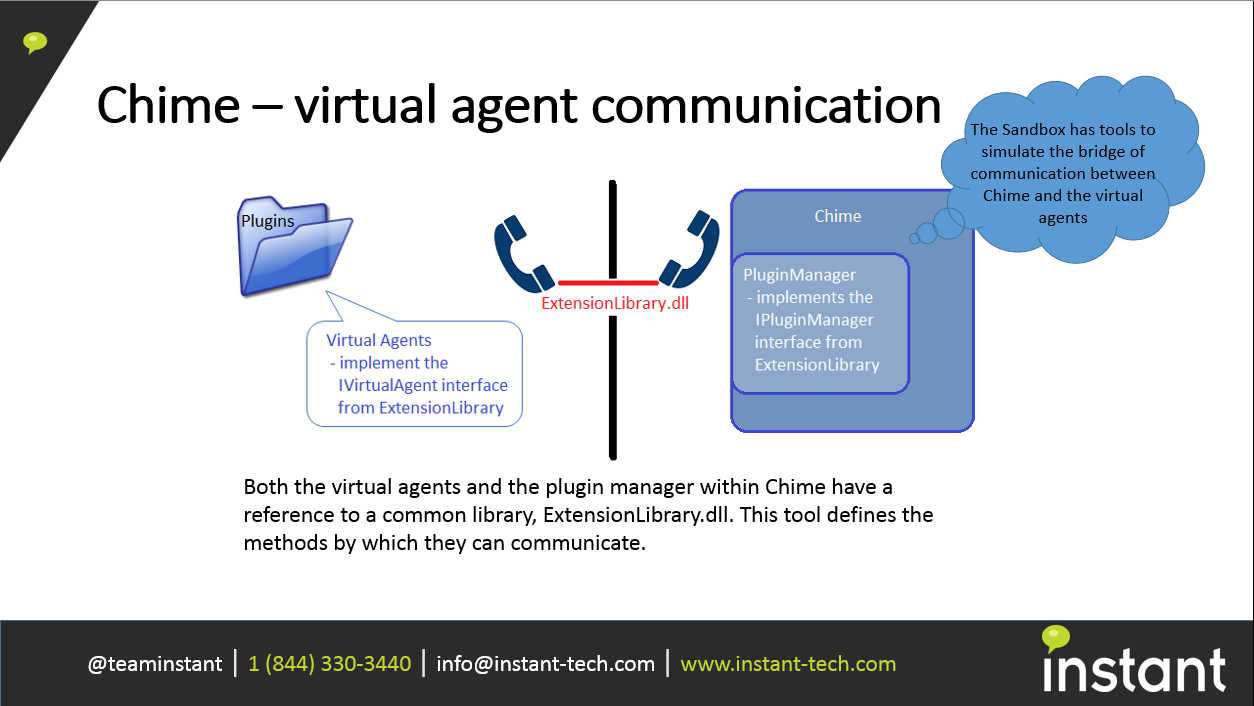
Many customers may choose to expose the QnA service via a bot utilizing Microsoft’s bot framework (or possibly bot kit). The approach described below
removes any requirement to develop an additional ‘bot’ and instead places the QnA integration directly within an existing Instant Chime queue. This
integration allows the QnA instance to provide immediate value and enables a ‘route to human’ experience in the event that the question is not resolved
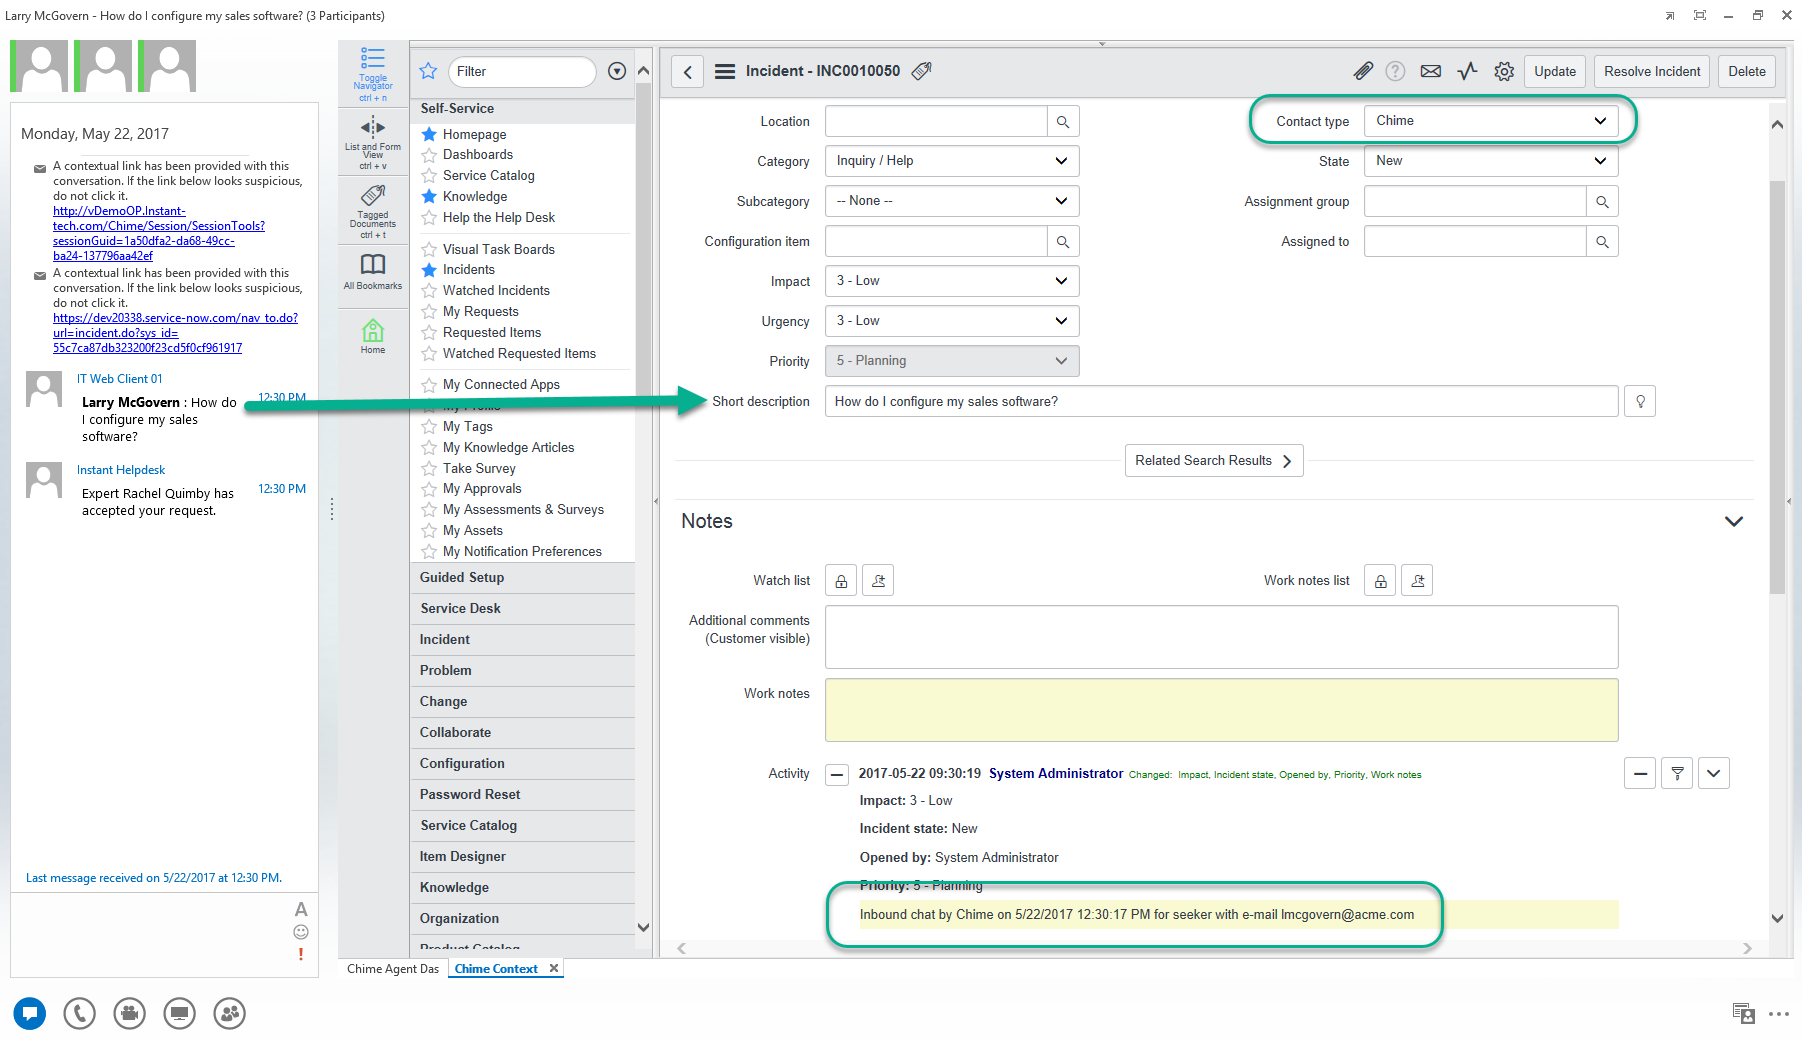
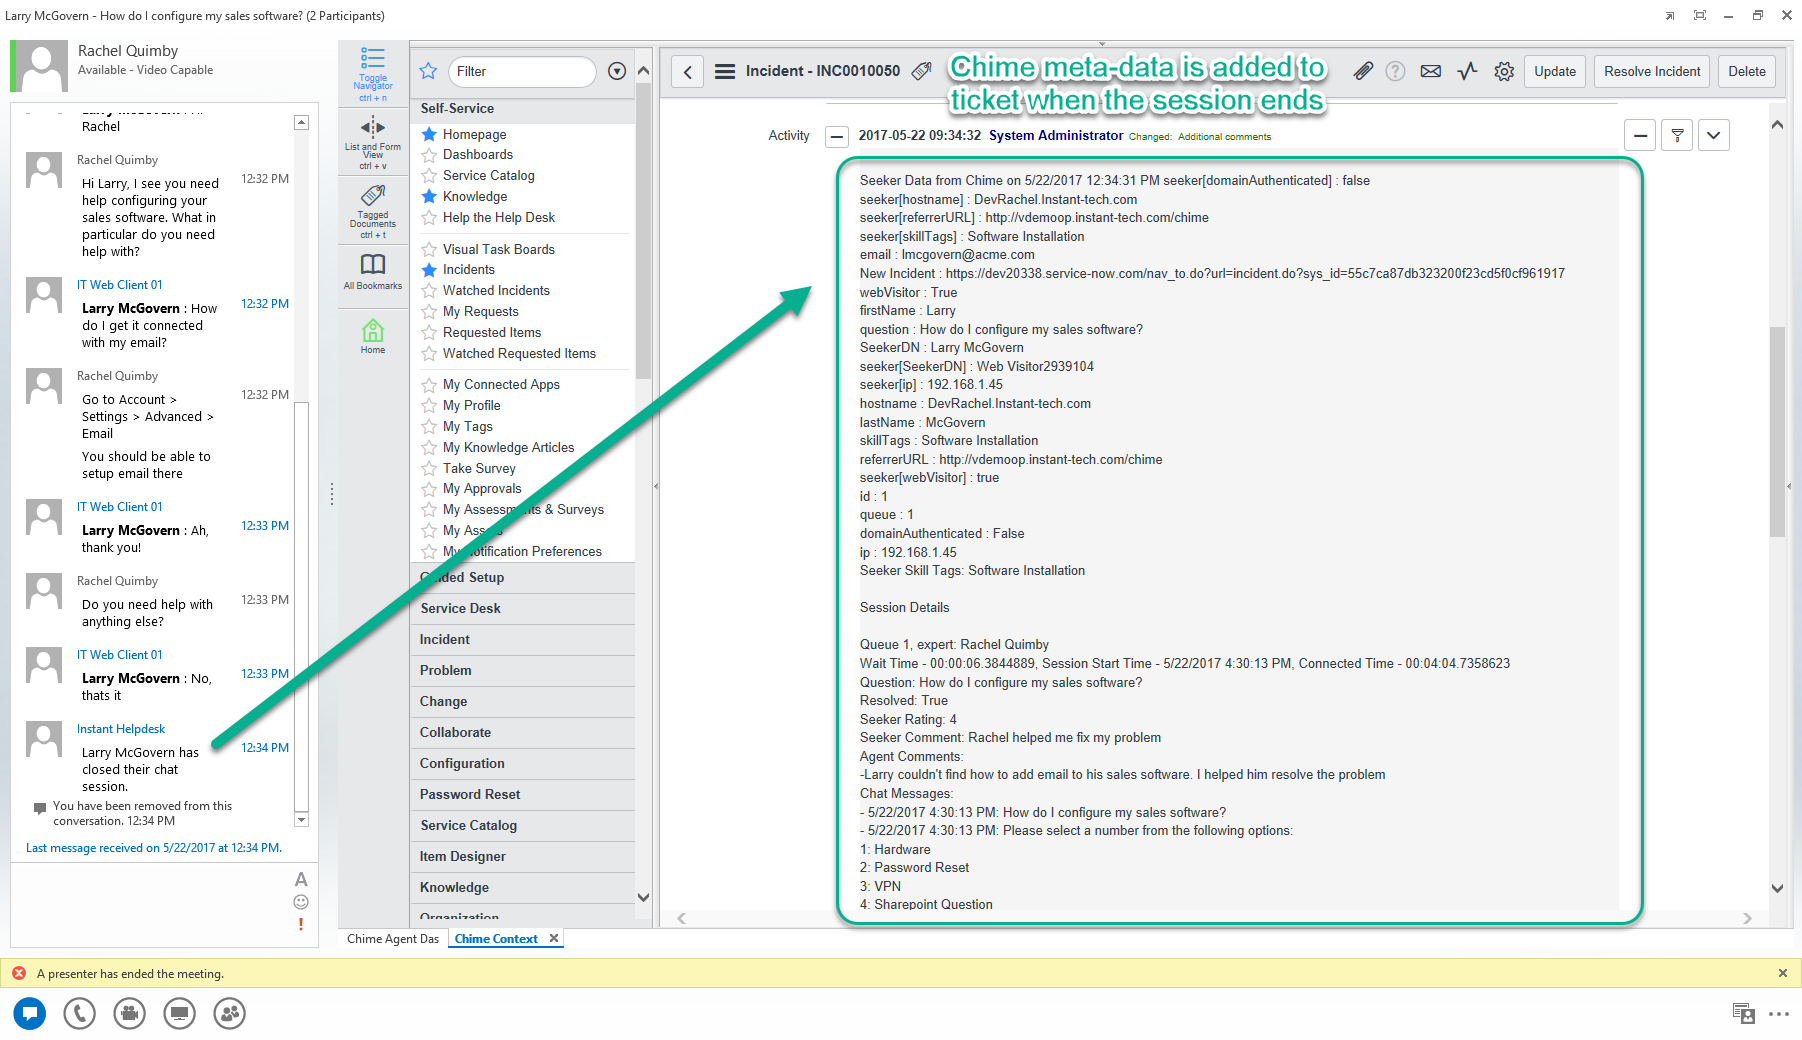
via the QnA documents. In the event that the initial question is resolved using QnA, the conversation is marked as resolved and stored to the Instant
Chime database – just like any other chat interaction.
Learning the QnA.json settings format
Using json allows us to have a simple way to store all data for the queue you are using, the knowledgebase information, and text resourcing you
will need to use for the Virtual Agent. The json file was constructed so that you can create a settings profile for any queue that you want to use the Virtual
Agent on. In addition to queue settings, you can also setup a default setting profile that will be used if there is no queue settings that match the
queue you are using.
Before going over what each individual setting does, we will explain the structure of the settings file:
-
Settings file must start and end with open and then closed curly braces { }
-
The Virtual Agent uses "Settings Profiles" to determine how it should run; these Settings Profiles are created and set up in the QnA.json file.
-
Settings Profiles are name/value pairs that get saved by the Virtual Agent. The Profiles will have the same format every time making it easy to reference
another profile when setting up a new one.
The Settings Profile consists of three things:
-
A name. This must be wrapped in quotation marks to indicate that it is a string. This name is not used in the UI anywhere, so it can be
named however you wish (ex: "Helpdesk Profile", "Profile for the service desk" etc..)
-
A colon separating the name and value.
-
An object that contains all of the settings. This object is wrapped in curly braces as well, and will be where all of the customization takes place.
-
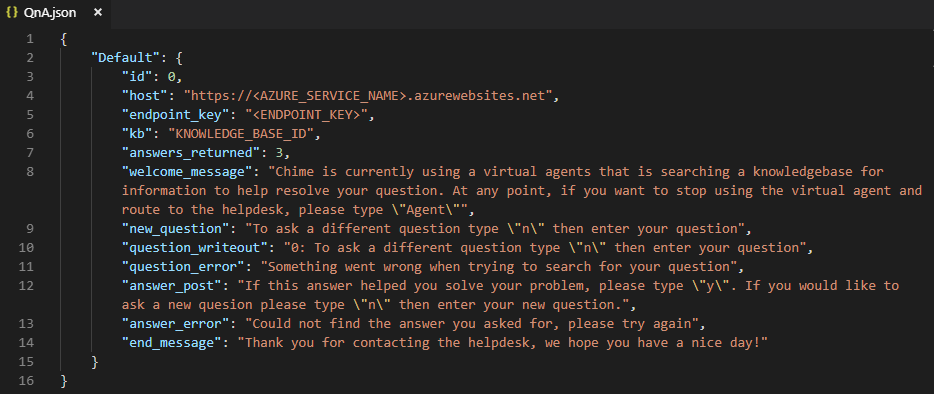
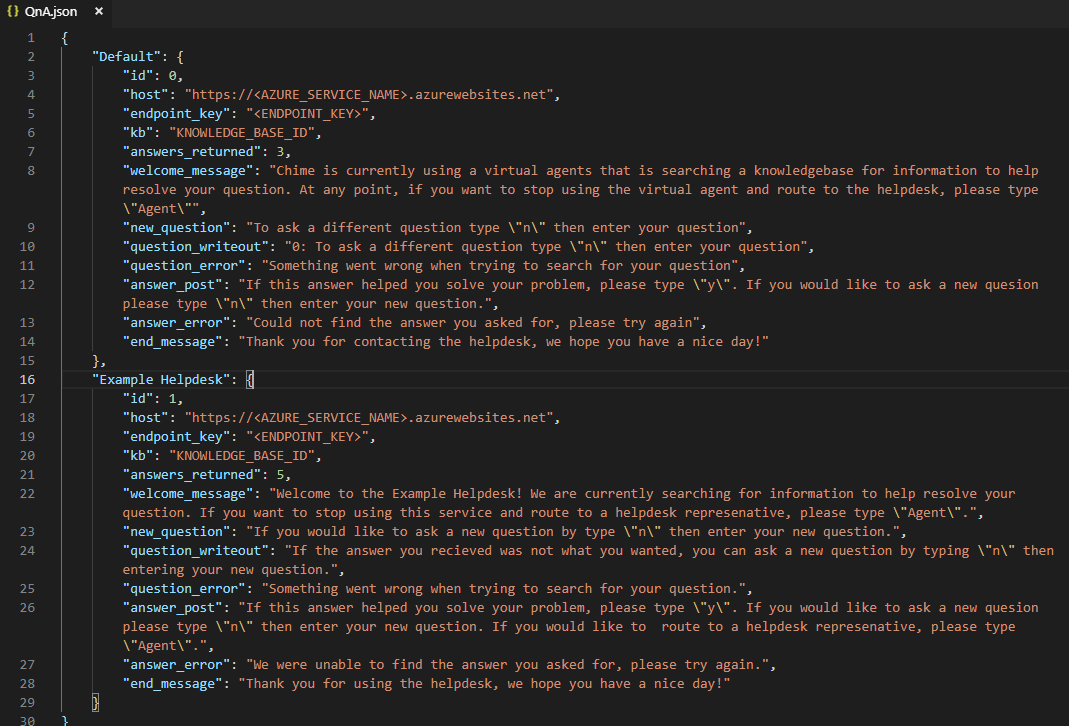
id - The id setting identifies which queue you would like these settings to apply to. If you are setting up a default setting,
set this to 0 so that other queues don't use these settings if they should be using other settings.
-
host - The host is an essential part of the URI used when posting up to the QnA Maker API.
-
endpoint_key - The endpoint_key is used in the header of the post request sent up to the QnA Maker API that allows the Virtual Agent
to send posts and get responses.
-
kb - kb is short for knowledge base. This setting allows the Virtual Agent to point to the correct knowledge base when requesting information.
-
answers_returned - This is an integer that represents the number of answers that will be returned by the QnA Maker API. By default this number
is 3. If you want to increase the number, check that your service is enabled to return more than 3 indexes before changing this setting.
-
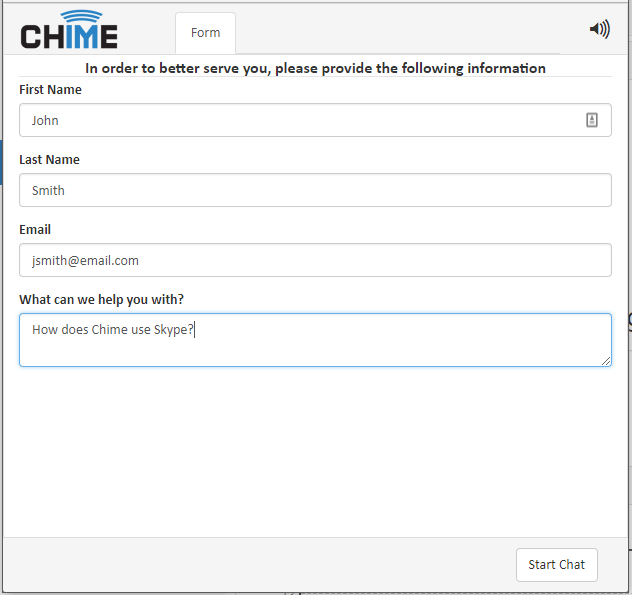
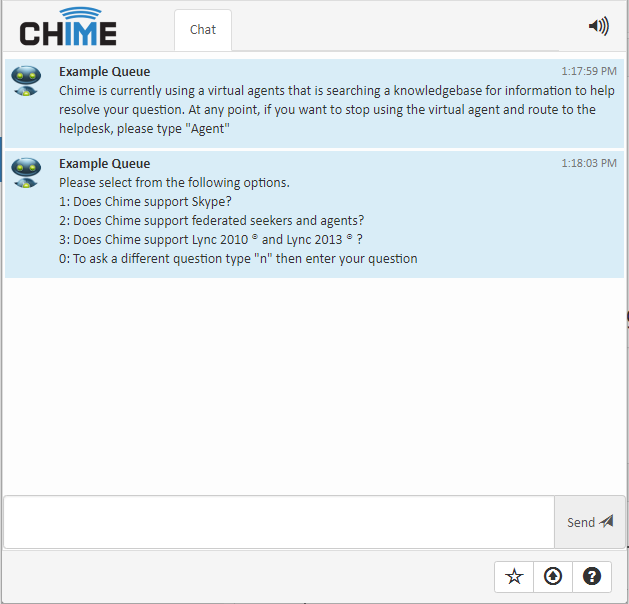
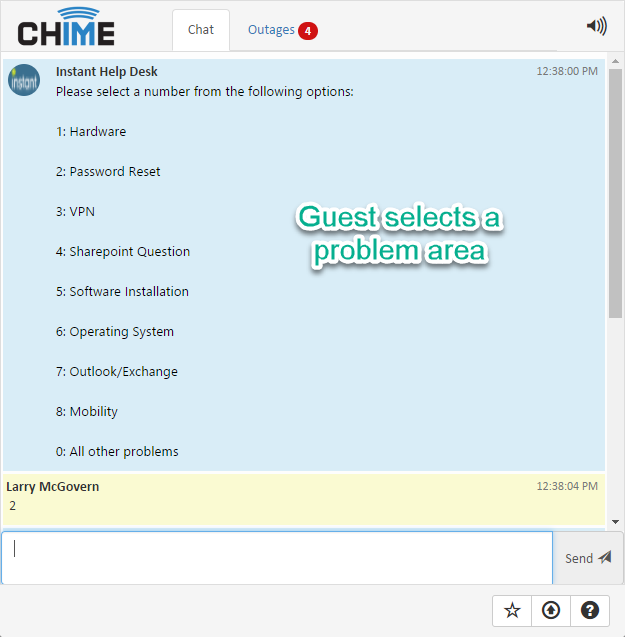
welcome_message - This is the first message that will be displayed to the Guest when they enter the queue. By default it lets them know
that a Virtual Agent is running, but it can be customized how you wish. Note: If you do not want a welcome message, simply leave it as "".
-
new_question - This message is displayed to users if they attempt to ask a new question, but do not do it correctly.
-
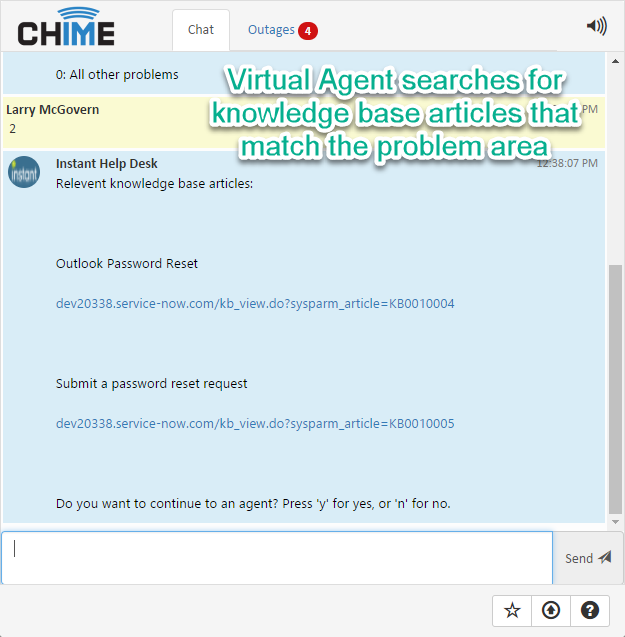
question_writeout - This message is displayed at the very end of the list of question results that are presented to the Guest, informing them how
ask a new question if desired.
-
question_error - This is an error message. If anything goes wrong with the post request, this error message will be displayed for the Guest.
-
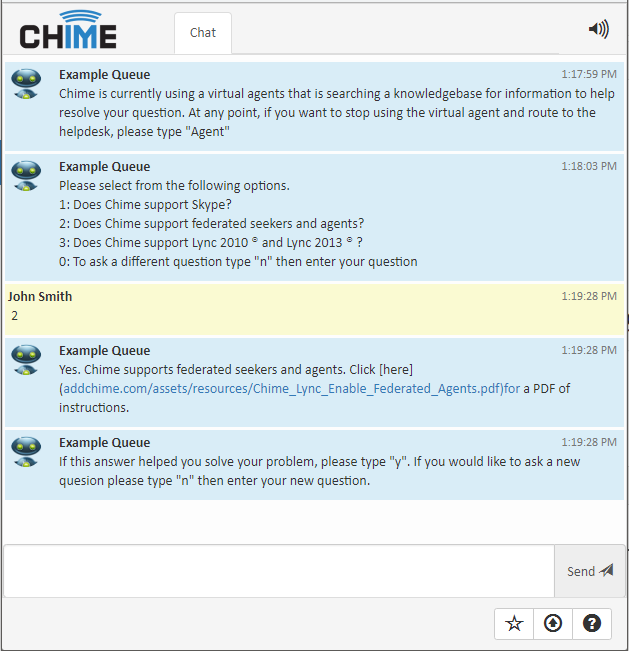
answer_post - Once the Guest chooses a question, the Virtual Agent will display the answer for them. After the answer is displayed, this message
will pop up and prompt them if they want to ask a new question or resolve the chat session.
-
answer_error - This is an error message. If anything goes wrong while trying to return the answer to the Guest, this will be displayed.
-
end_message - This is the goodbye message that will display for the Guest if they resolve the chat.
Customization options
In this section we will cover the three major customization tools you have in the QnA.json file; adding in new Settings profiles, using
the default Settings Profile, and the different ways you can tweak the settings options to access different features. Additionally,
we will include some helpful tips and tricks as well as some warnings about actions that could cause the Virtual Agent to malfunction.
Adding in new Settings Profiles
-
Open up the QnA.json file in the plugins folder. If there are no Settings Profiles in the file, go through the Quick-start and make
sure you have the default profile set up.
-
Before you add a new profile, you must add a comma after the last curly brace ( Like this: "}," )
-
Copy the default profile and paste it on the line after the comma you just added.
-
Rename the Setting Profile (using the name of the queue you are setting up makes it easier to remember)
-
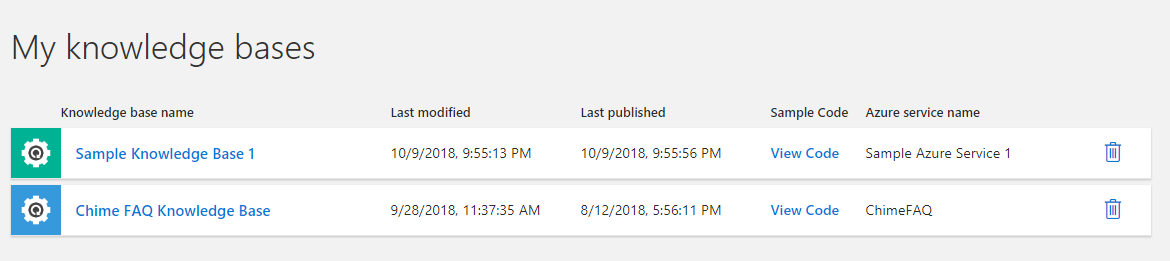
Get the id for the queue in which you want to create the Settings Profile. To get the id, navigate to the Queue Dashboard and copy the id
number from the url. The Url will look like this: "https://ChimeServerUrl/Chime#!/queue-dashboard/2/dash" the queue id would be "2"
-
Set the "id" field in the QnA.json file to the queue id.
-
Collect the host, endpoint key, and knowledgebase id information for the knowledgebase you want to connect to the Virtual Agent.
Replace the default settings with the ones that you just collected.
-
Modify the rest of the settings and text resources so that they fit the queue that you want to set up.
-
Here is an example of what the finished Settings Profile might look like.
Default Settings Profile
-
The "Default" Settings Profile is a little different than any other Setttings Profile because it will be used on any queues
that have the Virtual Agent enabled and do not have an existing Settings Profile.
-
The QnA Maker Virtual Agent can identify the Default Profile by name or by id. When using the Default Profile, please keep either
the name set to "default", or the id set to 0. If the id is set to anything other than 0, the Virtual Agent may not work as intended.
-
It is highly recommended that you keep a default profile set up so that you can have a backup in case one of the other Settings Profiles fail.
The default can act as a backup.
-
You can only have one default set in the Settings file. It is unlikely that there will be an issue if you set up multiple, but it is possible that
there could be unknown issues caused by using multiple.
-
The Default Settings Profile can be used in many ways, but is recommended as a general help QnA Maker knowledge base.
-
Multiple queues can take advantage of the Default profile, allowing you to use the same QnA Maker Knowledge base for multiple queues without having
to create multiple Settings Profiles.
Accessing Different Features
-
The answers_returned feature can be very helpful for customizing your Virtual Agent. The minimum number of answers returned you can set it to is 1,
and the basic plan allows you to use a maximum of 3. If you would like to have more than 3 returned answers, you will need to have a knowledgebase
that supports more than 3 indexes returned.
-
If you set answers_returned setting to 1, the QnA Maker will automatically send the highest rated response to the Guest without having them
choose a question.
-
All of the text resourcing is customizable allowing you to have custom greetings, responses and prompts. This also means the Virtual Agent can
be translated into any language.
-
If you would like one of the text resources not to display for the user, simply leave it as "text_resource_name": ""
-
At this time you are not able to add one Settings Profile to multiple queues. This feature might be added later. If you would like
this feature please let us know.

