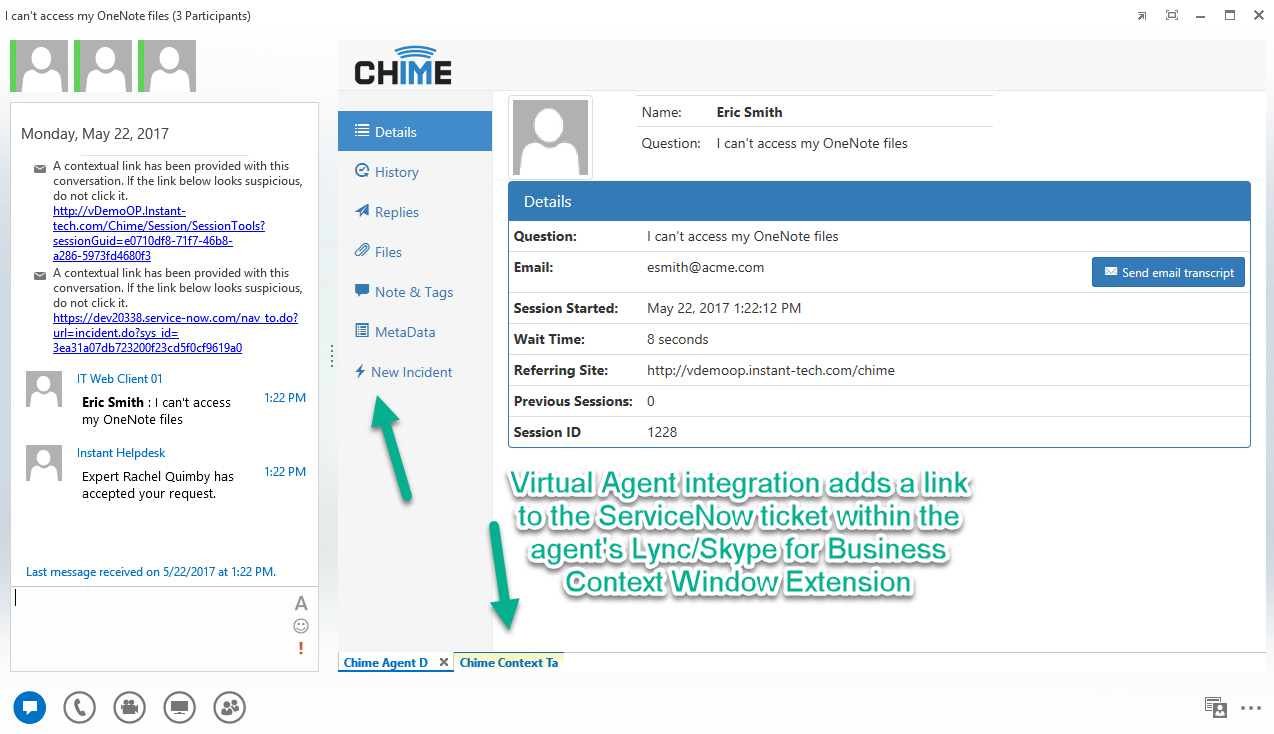
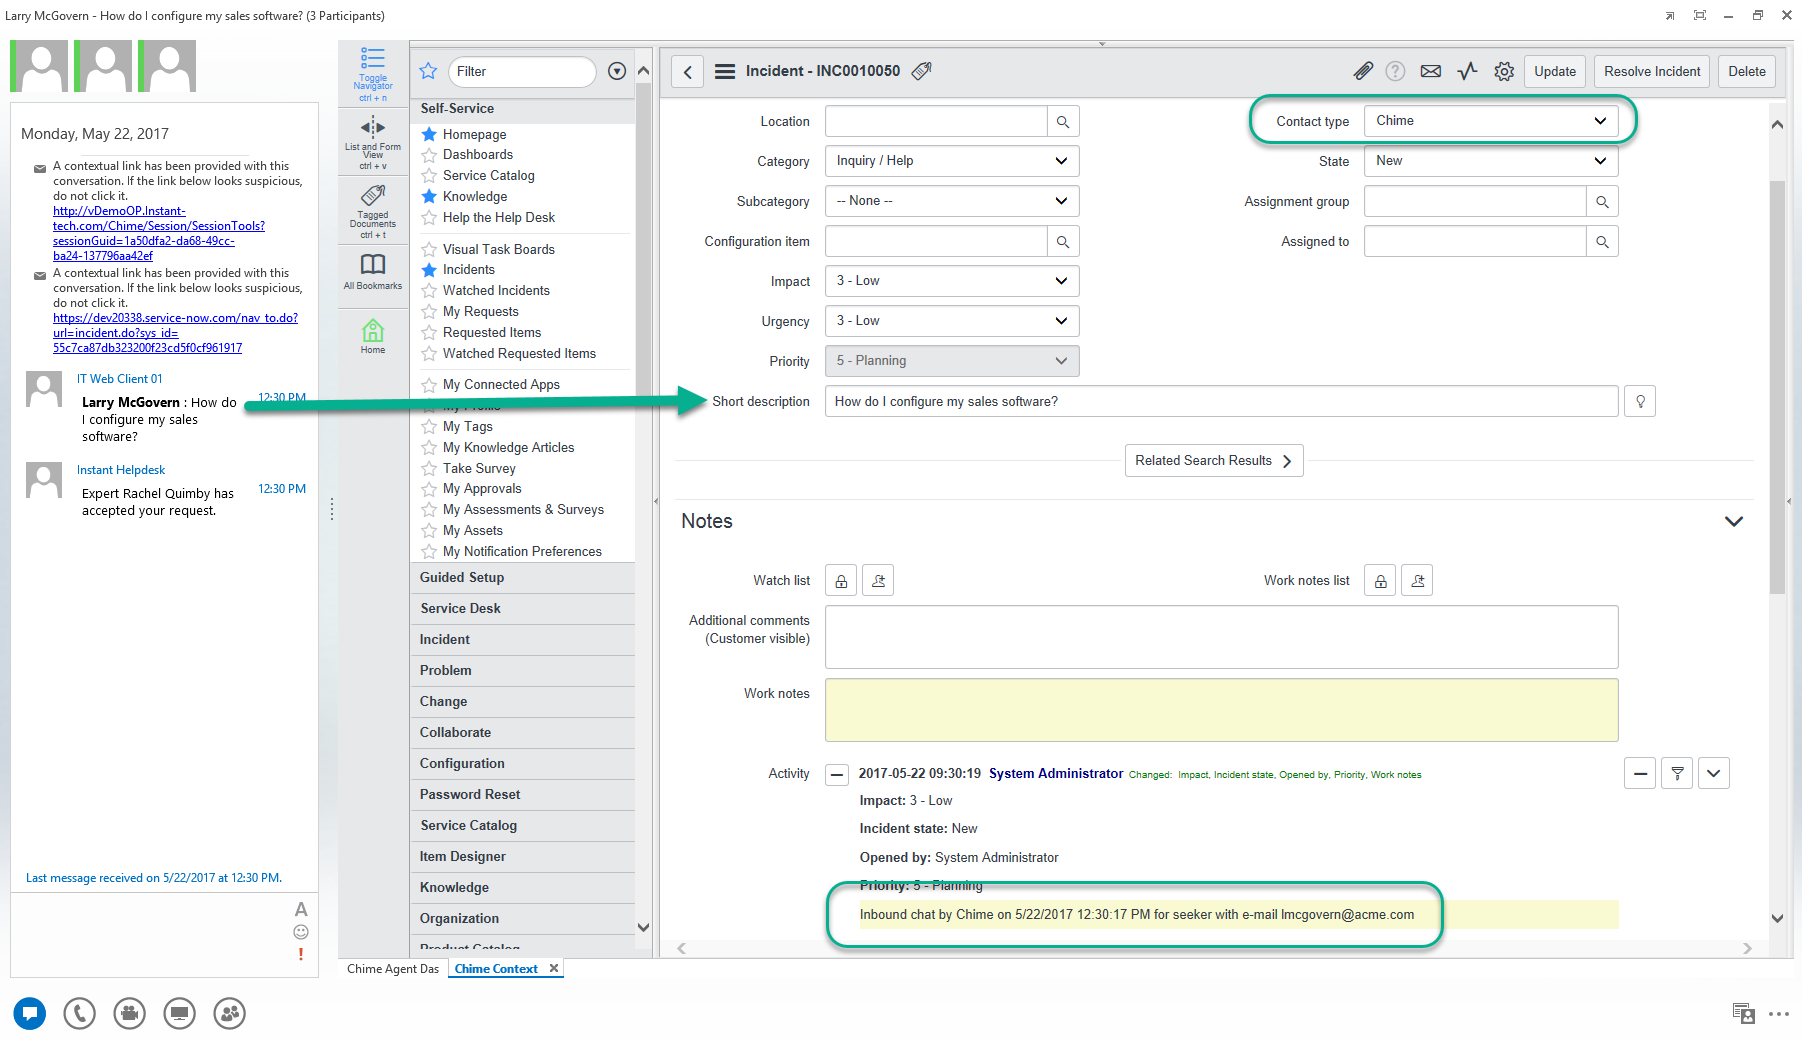
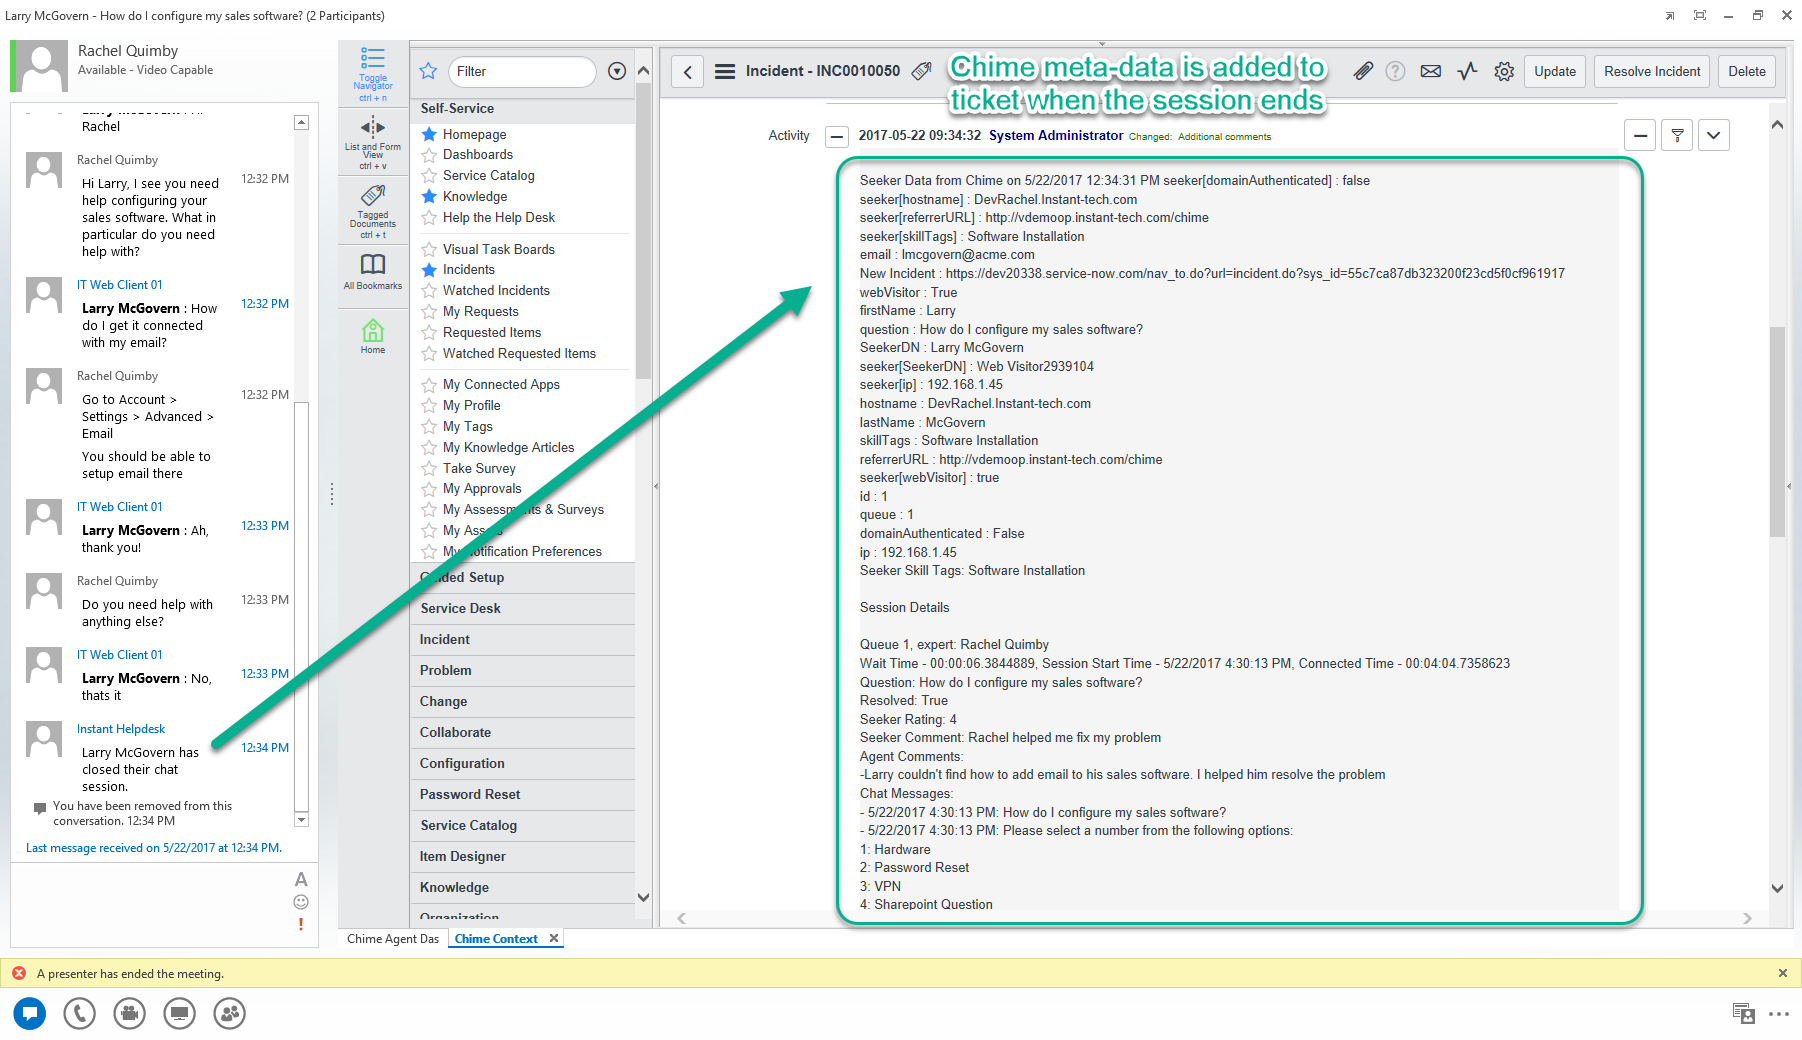
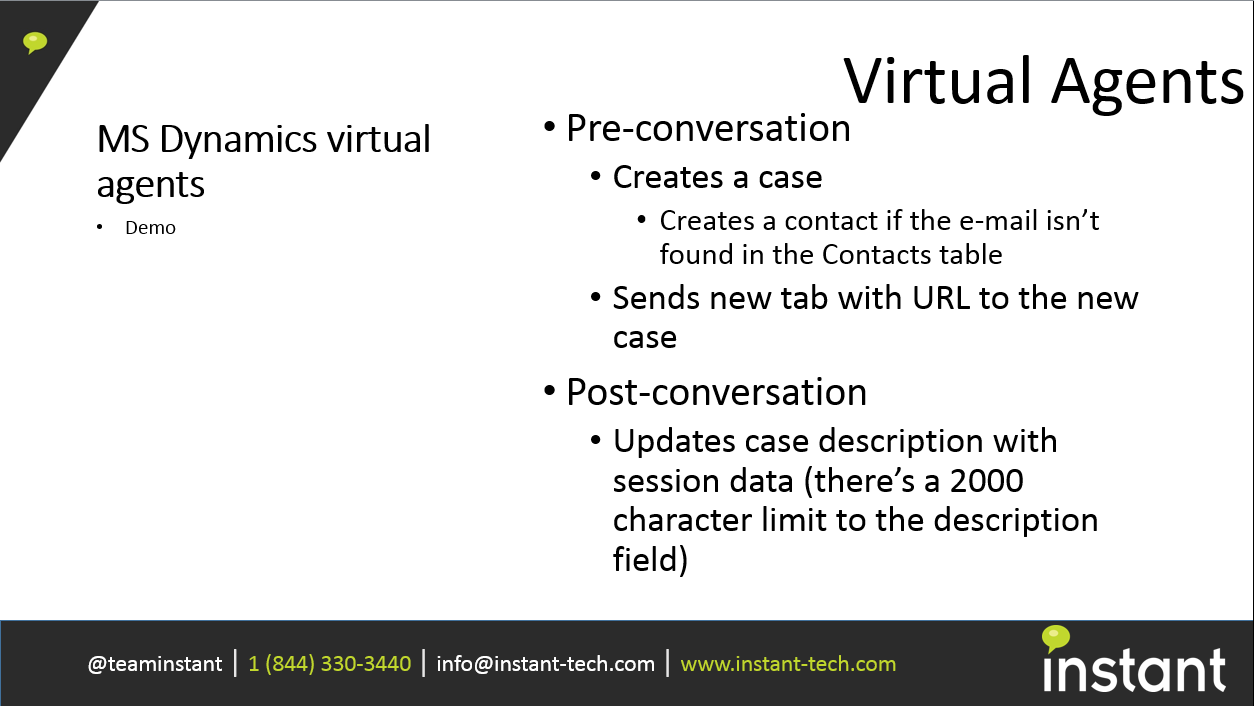
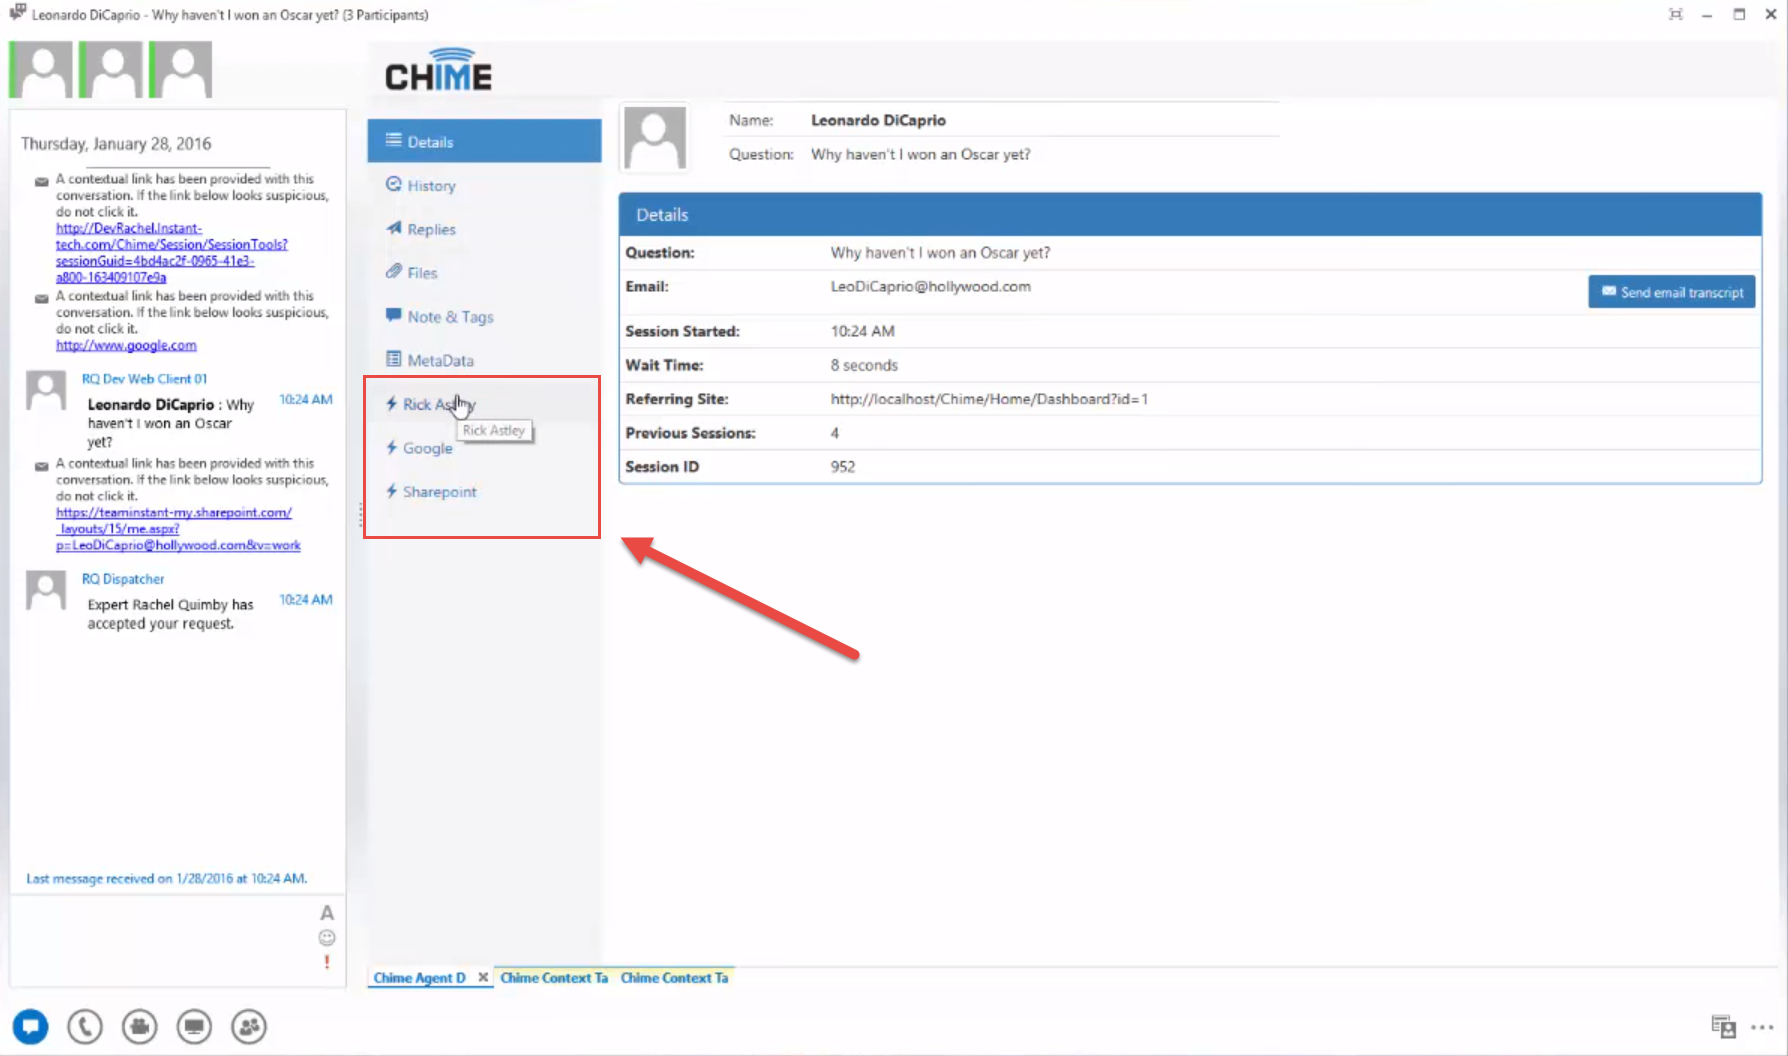
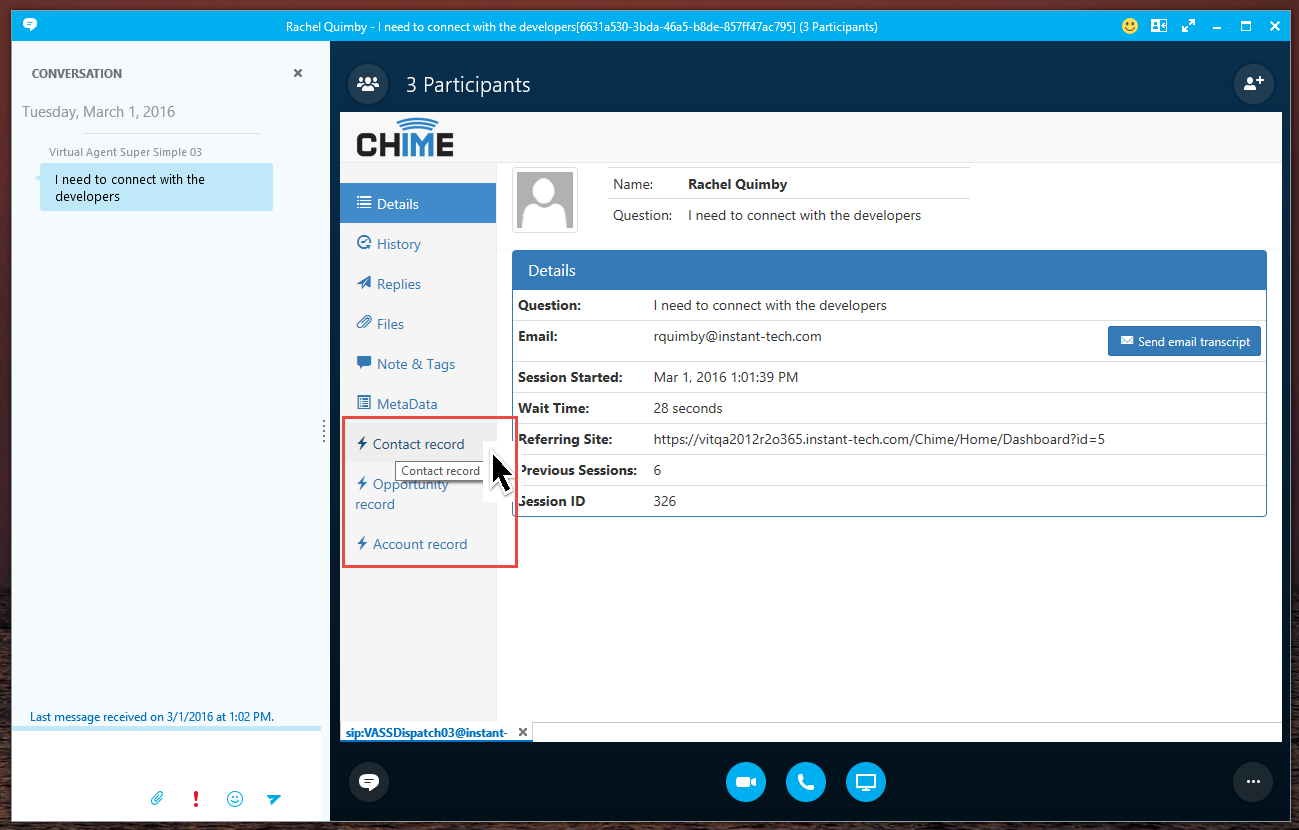
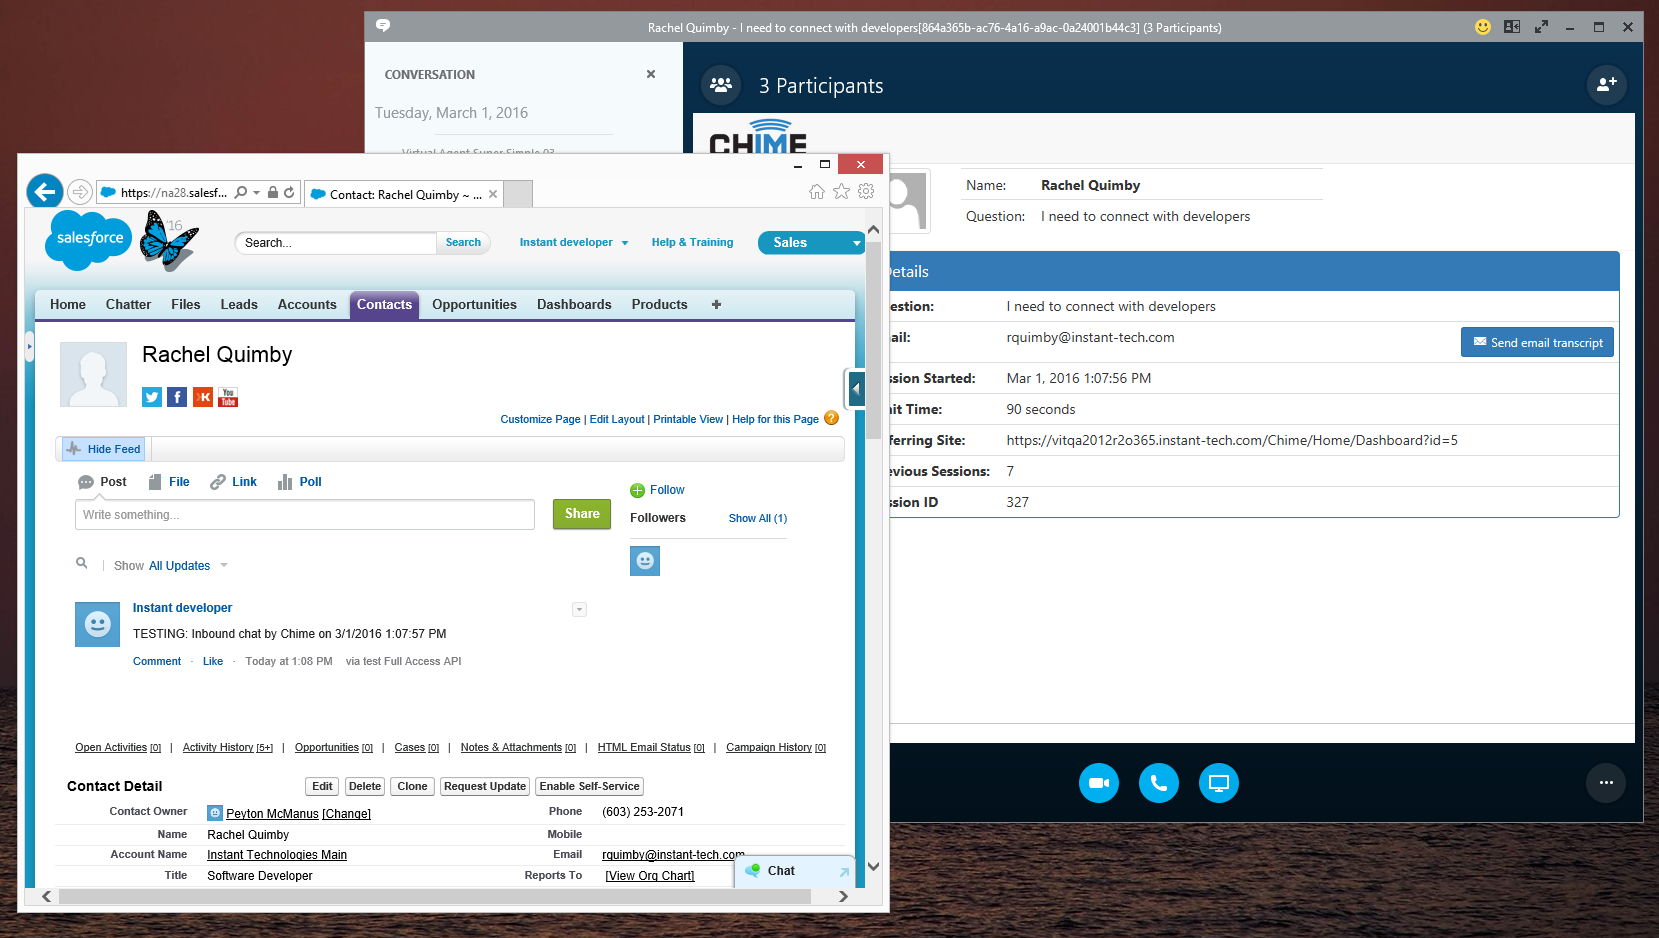
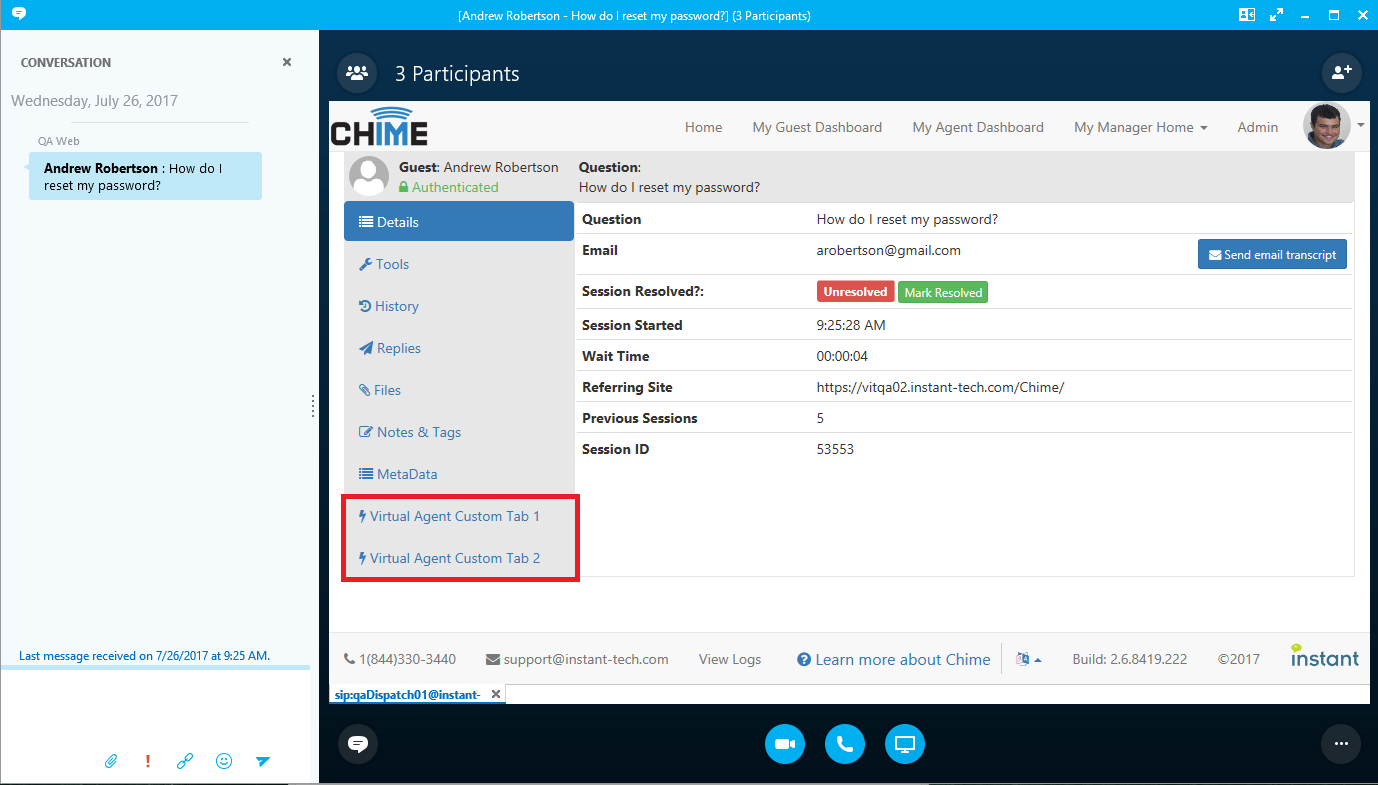
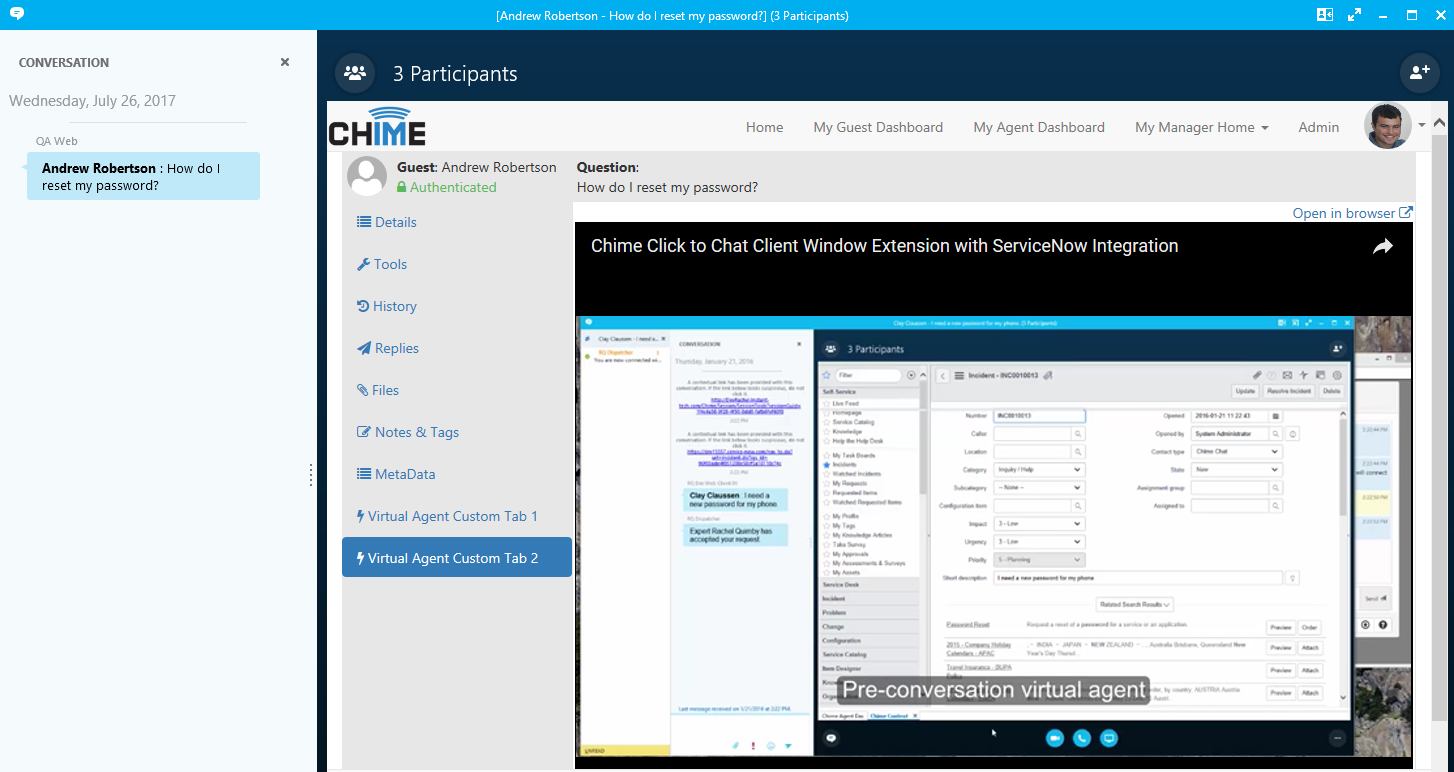
The ServiceNow sample from the Virtual Agent SDK has two Virtual Agents that work together to create an Incident record when a session enters the Chime queue, and then is updated when the session finishes. The Pre-Conversation Virtual Agent creates the Incident record, and fills out the following fields:
Service Now Virtual Agent (zip) Credentials Encryptor (zip)
This integration sample depends on a small customization to the ServiceNow service. In this sample the pre-conversation Virtual Agent uses the option "chat" for the Contact Type field of the Incident table. To make this customization within ServiceNow, from the Admin home page, go to Data Management, Personalize Form, then Choose Incident [incident] as the table and select Next, then in the upper navigation bar choose to go back to Configuring Incident Form. Click the cog settings button in the upper-right hand corner, then right-click the Contact type field and select "Configure Dictionary". Here you can add a new choice. Insert a new row under Choices, with label "Chat", value "chat", language "en", and inactive set to false. Choose Update to save these changes.
The following examples use these references. These examples use Newtonsoft Json library to serialize the objects we send to the ServiceNow API in json.
using Newtonsoft.Json;
using System;
using System.Collections.Generic;
using System.IO;
using System.Linq;
using System.Net.Http;
using System.Net.Http.Headers;
using System.Text;
using System.Xml.Linq;
This code snippet shows you how to use your ServiceNow credentials to construct an authentication header for making basically authenticated HTTP requests to the ServiceNow REST API. The ServiceNow REST API supports basic authentication and OAuth. You can then use a dummy query to ServiceNow to verify that your authentication header is valid. The dummy query in this case asks for the first ten records from the Incident table, this is a default ServiceNow table.
authHeaders = new AuthenticationHeaderValue("Basic", Convert.ToBase64String(Encoding.UTF8.GetBytes(username + ":" + password)));
    public void ConnectToServiceNow()
    {
        using (var client = new HttpClient())
        {
            client.DefaultRequestHeaders.Authorization = authHeaders;

            string connectURL = instance_url + @"incident?sysparm_limit=10";
            var response = client.GetAsync(connectURL).Result;
            if (response.IsSuccessStatusCode)
            {
                isConnectedToServiceNow = true;
                Console.WriteLine("Success connecting");
            }
            else
            {
                isConnectedToServiceNow = false;
            }
        }
    }
This example shows you how to create an incident record (ticket) in ServiceNow via their REST API, populate some fields, and then construct a URL to the newly created ticket. We use the Newtonsoft Json library to serialize a local Incident object for making the Post request. For Post requests, ServiceNow requires the accept header and the content-type header to be “application/json”.
public class Incident
{
    public string short_description;
    public string work_notes;
}
    public void CreateTicket(string email, string question)
    {
        string createIncidentURL = instance_url + @"incident";
        Incident newIncident = new Incident() { short_description = question, work_notes = "Incident reported by " + email};
        var jsonString = JsonConvert.SerializeObject(newIncident);
        using (var client = new HttpClient())
        {
            client.DefaultRequestHeaders.Authorization = authHeaders;
            client.DefaultRequestHeaders.Add("Accept", "application/json");
            HttpRequestMessage request = new HttpRequestMessage(HttpMethod.Post, createIncidentURL);
            request.Content = new StringContent(jsonString, Encoding.UTF8, "application/json");
            var response = client.SendAsync(request).Result;
            if (response.IsSuccessStatusCode)
            {
                var newIncidentURL = response.Headers.Location.OriginalString;
            }
        }
    }
This example shows how you can update a record in ServiceNow, given that record’s sys_id. This sample will update the comment field of an Incident record, given that record’s sys_id.
public class UpdateIncident
{
    public string comments;
}

    public void UpdateTicket(string comment, string sys_id)
    {
        UpdateIncident updateIncident = new UpdateIncident(){ comments = comment};
        var jsonString = JsonConvert.SerializeObject(updateIncident);
        string updateIncidentURL = instance_url + @"incident/" + sys_id + "?sysparm_exclude_ref_link=true";
        using (var client = new HttpClient())
        {
            client.DefaultRequestHeaders.Authorization = authHeaders;
            client.DefaultRequestHeaders.Add("Accept", "application/json");
            HttpRequestMessage request = new HttpRequestMessage(HttpMethod.Put, updateIncidentURL);
            request.Content = new StringContent(jsonString, Encoding.UTF8, "application/json");
            var response = client.SendAsync(request).Result;
            if (response.IsSuccessStatusCode)
            {
                Console.WriteLine("Success updating ticket");
            }
            else
            {
                Console.WriteLine("Unsuccessfully updated ticket");
            }
        }
    }
Have a question about Chime integration with ServiceNow®? Ask one of our developers at InstantDev@instant-tech.com.


 ServiceNow® Integration (5)